
Crepes might sound like a fancy French dish, but this versatile staple should be in every home cook’s repertoire. These thin pancakes have several wonderful qualities: 1) they’re the perfect canvas to handle a wide variety of flavors, including everything from fresh fruit to chicken; 2) crepes can be made well in advance, either kept in the refrigerator for a few days or in the freezer for a few months; and 3) they’re so simple to make, even a child can do it. I’ve taught my youngest children to make them, so there’s no excuse for you to not give them a try yourself.
I’ll keep the focus on dessert crepes this time, using a Julia Child recipe I modified slightly. But the basic crepe recipe is pretty universal: a mixture of eggs, flour, milk, water, butter, and salt, with some sugar and flavoring added in for sweet uses. The important thing to remember is that the flour needs time to hydrate to achieve the best result, so give your batter a couple of hours in the refrigerator before you use it. You can use Wondra flour and skip the wait, but regular AP is more budget friendly and the wait isn’t hard to manage.
Make sure you have a good non-stick skillet or a well-seasoned traditional skillet with a flat bottom of at least 5 inches, though you can make crepes of any size. I test the heat of my skillet by sprinkling it with drops of water. If they skip and disappear nicely, I’m good. If they instantly evaporate, I turn down the heat. If the water slowly starts to simmer, I crank it up. At some point in the baking process, you’ll find the ‘sweet spot’ of your skillet. But the first crepe or two might not be your best. Even your ‘mistakes’ will be edible, however, so don’t be discouraged if your first attempts aren’t Food Network worthy.
Basic Sweet Crepe Batter
In a blender, mix together well, putting wet ingredients first:
3 large eggs
2/3 cup whole milk
2/3 cup water
6 tablespoons melted butter (you can substitute vegetable oil)
1 tablespoon sugar
1/8 teaspoon salt
½ teaspoon vanilla
1 cup all-purpose flour
Keep batter in the refrigerator for 2 hours at least though you can make it the day before if desired. When ready to use, heat up your non-stick skillet so that water drops skip on the surface. Give the skillet a quick coating of non-stick spray. Pick up the skillet and pour a small amount in the center, then turn the skillet around until the bottom is covered with a thin layer of batter. The amount will depend on the size of your skillet. If you’ve never made crepes before, it may take you a few tries to figure out what works for your skillet. Replace skillet onto the stove.
Once the edges begin the brown and you see the surface beginning to look drier, use a silicon spatula to loosen the edges. Wiggle the spatula under the crepe and turn it over to briefly cook the other side. The first cooked sided is the ‘public’ side, while the second side you cook won’t look as pretty. It will only take 30 seconds or so to cook this second side. Remove cooked crepe to a cooling rack. I actually just pick up my skillet and quickly turn it upside down over where I want it. Continue to use non-stick spray as needed by your skillet.
Either use finished crepes immediately in recipes below or let cool and stack finished crepes, separated with sheets of waxed paper. These can be frozen in a Ziploc bag for use later.

Cinnamon Sugar Crepes
These are the simplest use for crepes but one of the most popular at my house. These are often requested for birthday breakfasts. As soon as you remove a finished crepe from the skillet, sprinkle the inside with cinnamon sugar. Fold in two opposite sides and roll it up, starting on a unfolded in, almost like a burrito. Top with powdered sugar if desired. My kids enjoy doing that part!
Fresh Fruit Crepes
Simply prepare your favorite fresh fruit—berries are a natural choice—and layer with sweetened whipped cream inside a crepe. (If you’re fruit isn’t too sweet, you can sprinkle the sliced fruit with sugar and let set in a bowl briefly before using, to allow the juices to come together.)
Apple Filled Crepes
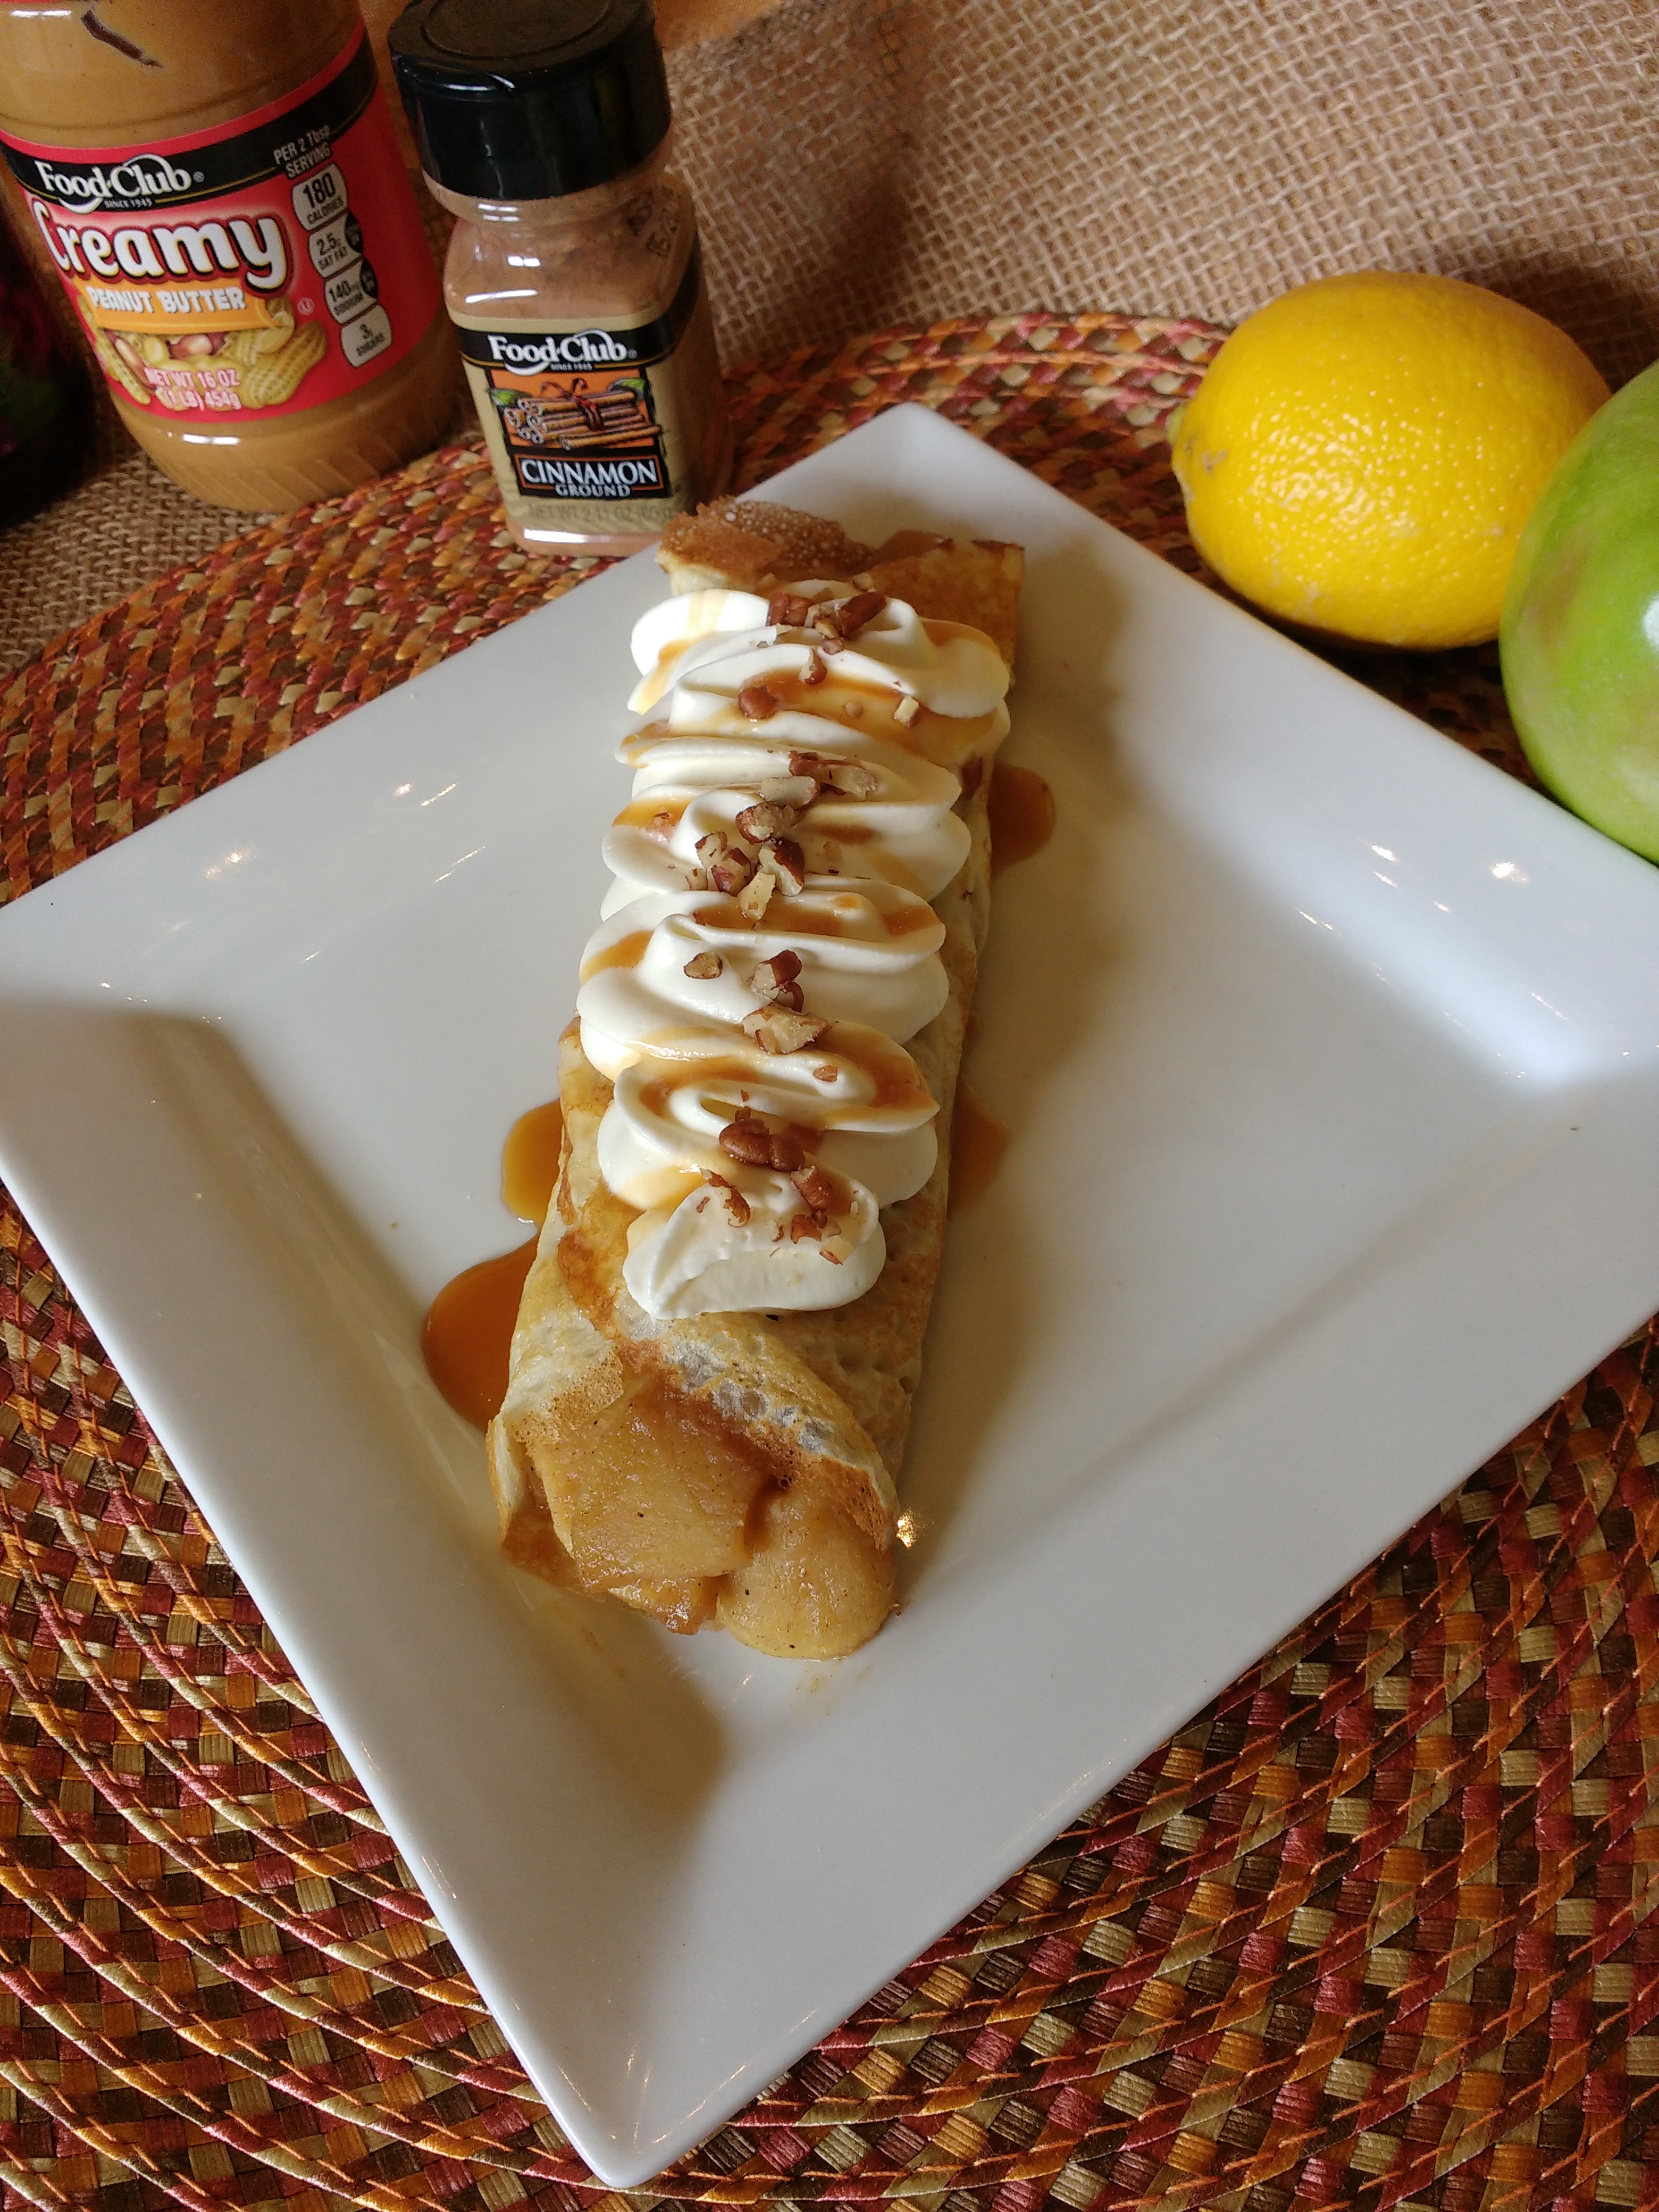
Take 3 Granny Smith apples, peeled and sliced (about 5 cups worth) and sauté in a skillet with 3 tablespoons of butter and a pinch of salt, until apples begin to soften. I find if I put a lid on the skillet this takes make less time, around 5 minutes. In a small bowl mix 4 tablespoons of brown sugar with ½ teaspoon of apple pie spice. Once apples start to soften, add the brown sugar mixture, along with a tablespoon of fresh squeezed lemon juice. (You can add a splash of your favorite rum, bourbon, or other liqueur if you desire.) Add another tablespoon of butter and check the apples for sweetness. Depending on how sweet or sour your apples are, you made need to add more lemon juice or more brown sugar, as to your liking. Once apples are nicely coated with the brown sugar and you like the flavor and texture of the apples, remove from the heat and let cool slightly. Use right away as a filling for a crepe or refrigerator for use later.
I like to top my apple-filled crepe with sweetened whipped cream, a drizzle of caramel sauce, and some chopped toasted pecans.
Here are a few examples to spur your imagination to what is possible with crepes.

Hazelnut Cream and Bananas Crepes
Spread hazelnut cream on a crepe and top with sliced bananas. Roll up or fold up as you wish and EAT!
PB&J Crepes
Give you kids a treat with this peanut butter and jelly version. At least for once, they won’t ask you to cut off the crusts first!

Apple Stack Cake Crepes
A true Appalachian Apple Stack Cake is a labor of love. I just made one for my dad’s birthday and I wish I’d been able to let it sit for 4 days instead of 2 before we had to cut it. You can capture some of that traditional flavor with this super quick version. If you have dried apples and the time, you can make your filling the old fashioned way. Or you can do what I did and use apple butter as your filing. Make your stack as high as you wish. Letting it sit at least overnight in the refrigerator will help the flavors to develop, but you can eat it right away if you can’t wait.
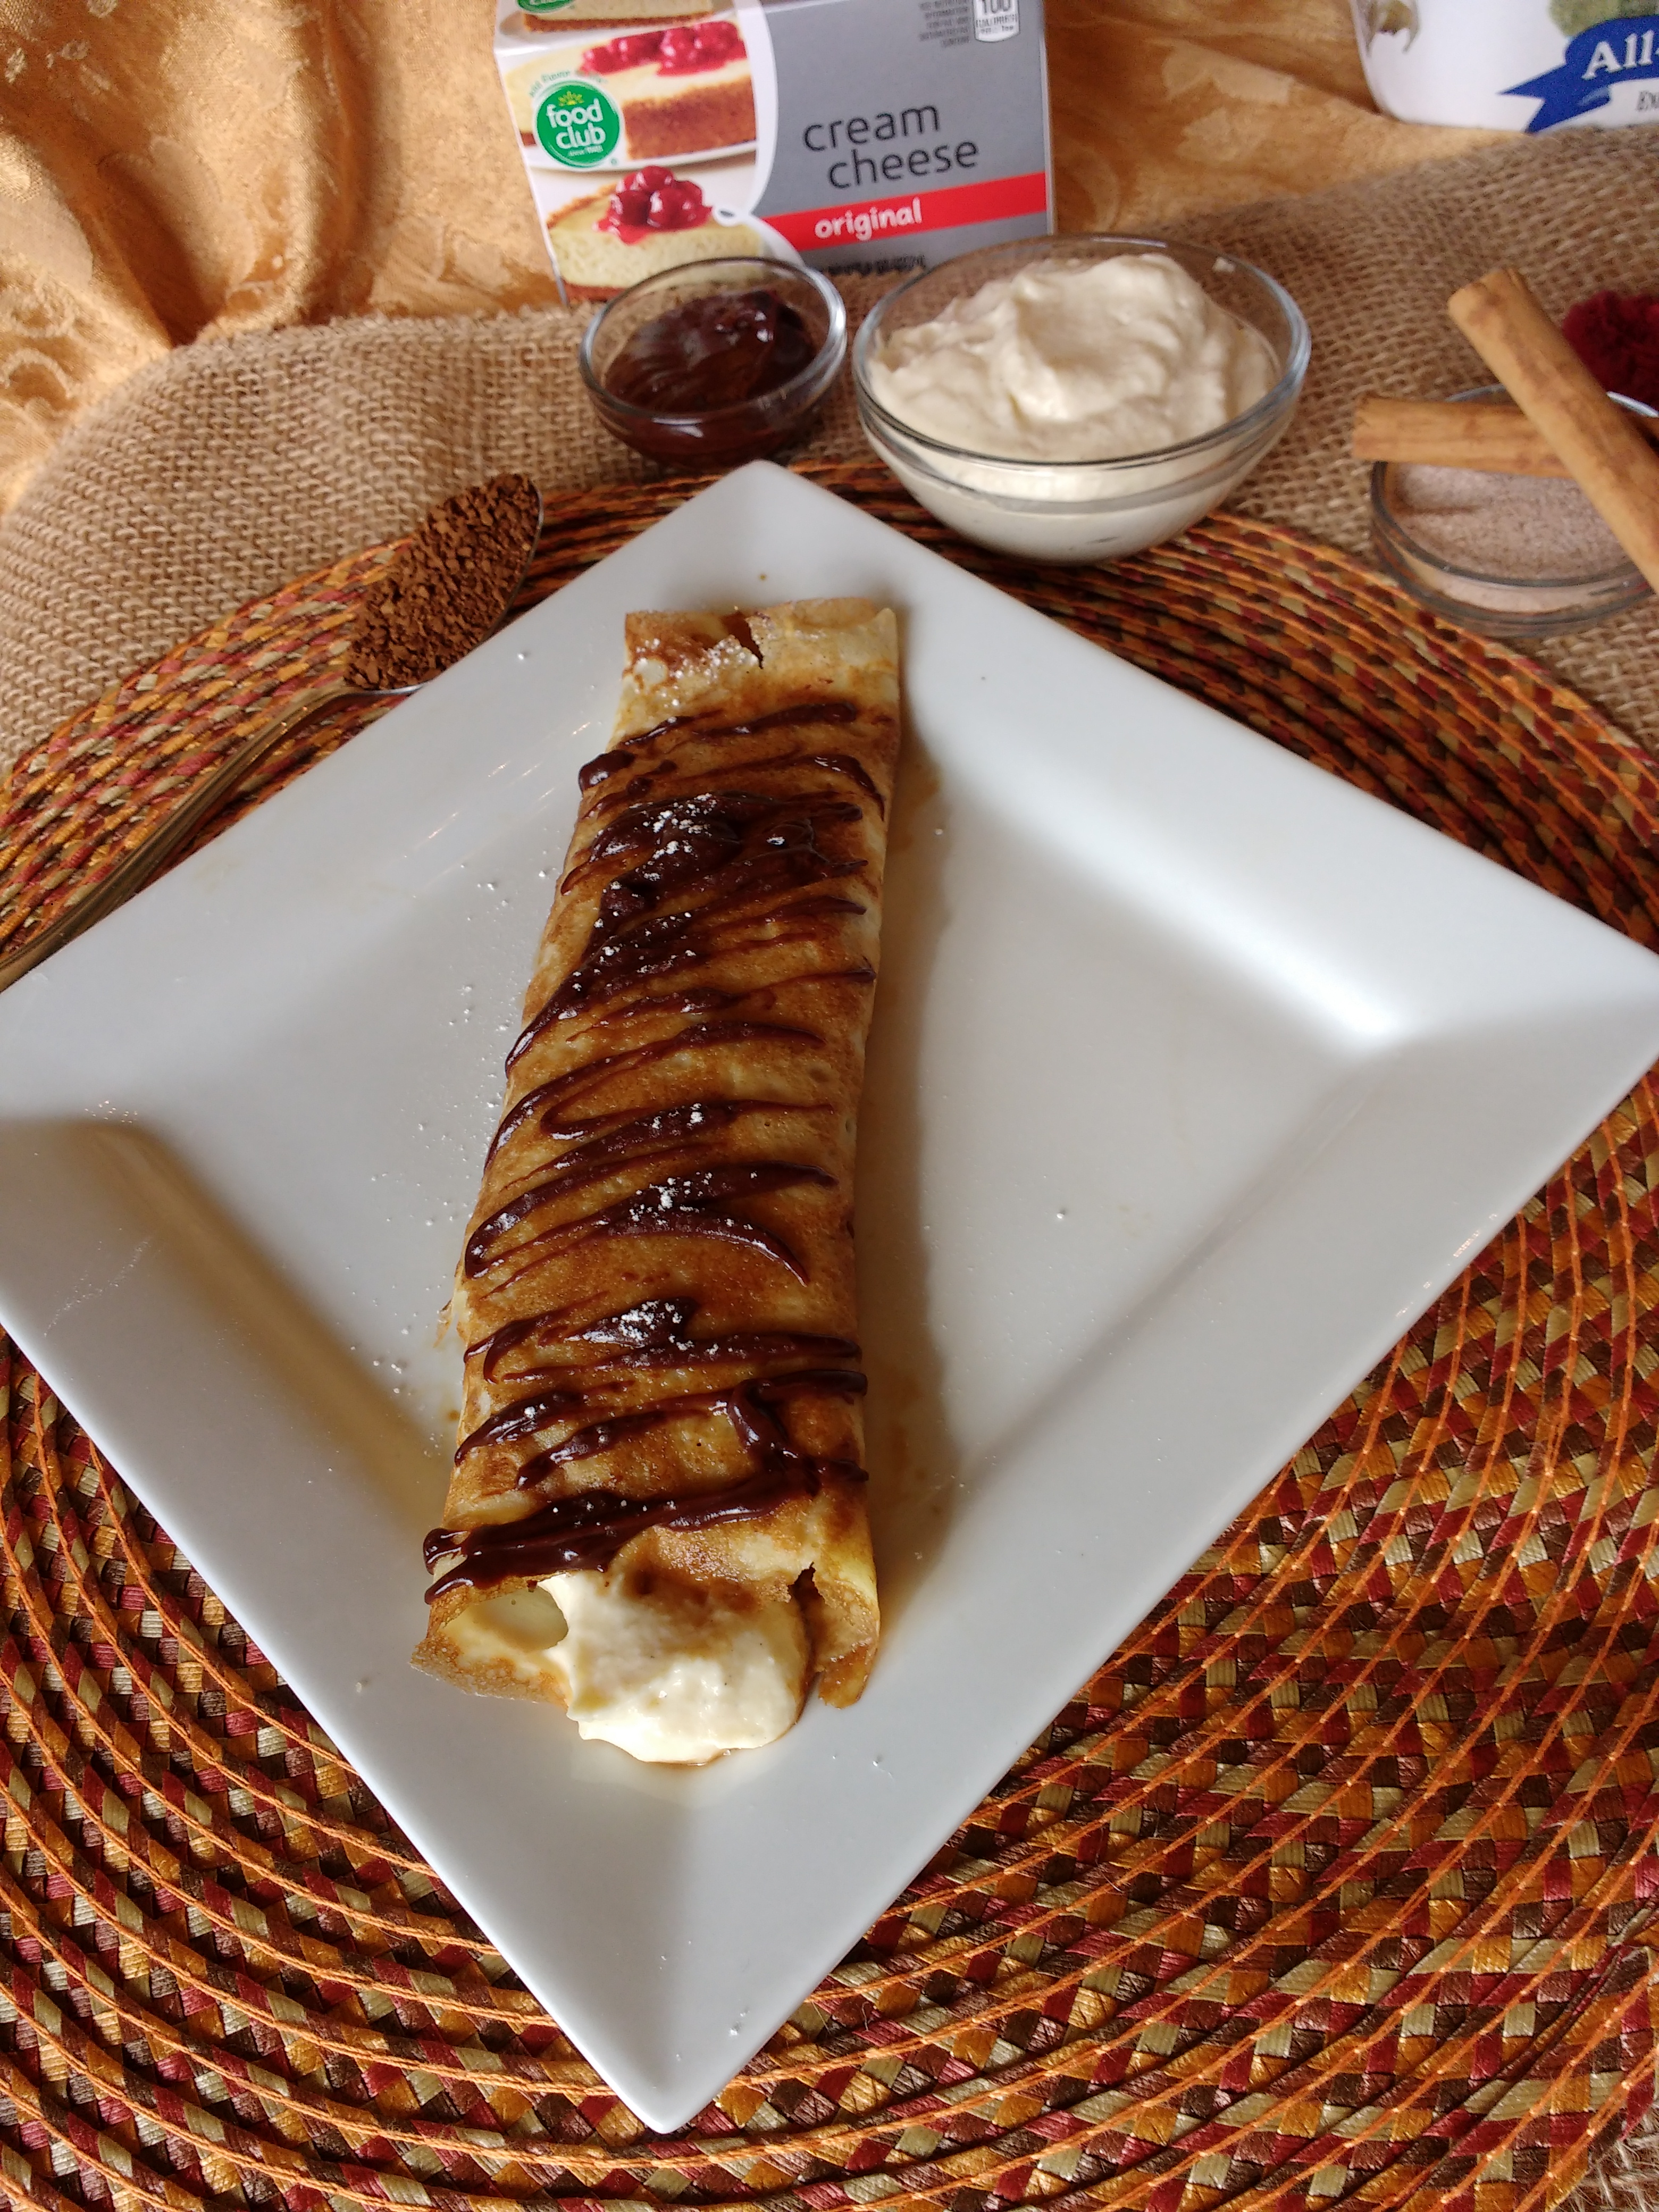
Tiramisu Crepes
I took the basic filling from a tiramisu recipe, and put it inside a crepe. I made a strong coffee/sugar soaking syrup to ladle on the top, then drizzled with chocolate sauce. You could also sprinkle with cocoa powder, but I knew my family would prefer the chocolate sauce option.
Think about your favorite flavors and see how they can work with a crepe. Let me know what combinations you create!
One last thing…
Remember, with crepes, even your mistakes are usually edible, even if they aren’t attractive. It’s the same in life. Sometimes our biggest mistakes can be turned into our greatest blessings, given the right perspective. Perfection is highly overrated. Those who never make mistakes are the ones who never achieve anything. The important thing to remember is that YOU are NOT a mistake.
Blessings,
Julie


