
I love cooking dishes for my family that are simple, delicious, versatile, and save me money. Roasted Chicken hits all those points and it’s a recipe I’ve used for years. And once you’ve made it, you’ve also created the base for several other tasty dishes as well.
Some cooks today have become accustomed to using only boneless and skinless cuts of chicken, not realizing the depth of flavor you gain from using the whole bird. By roasting a whole chicken, you get a delectable caramelized and crispy skin, juicy meat, and lovely drippings that can be used to make a gravy, soup, or create the perfect base for chicken and rice.
If you look at the price per pound, a whole bird is also an excellent value. Sure, you have bones and skin you’re paying for, but those give you flavor and broth you simply cannot achieve any other way. I promise, once you’ve tasted gravy made from roasted chicken drippings, you’ll have a hard time going back to gravy made from store-bought broth. (I sure hope you aren’t getting your gravy from a jar! If you are, check out”Gravy Train” section (#6) of one of my Thanksgiving posts here.)
Roasted chicken meat can be used in so many ways. Besides eating sliced or in pieces, you can chop the meat and use in fresh lettuce salads, soups, casseroles, chicken salad, or in wraps, just to mention a few options. I’ll show you our family favorite recipe for leftover chicken: chicken and rice. But first, let’s roast a chicken!
You can use either whole fryers or roasters. Roasters are bigger, but the process and end result is the same. To be honest, I usually buy the cheapest option and roast two birds at once. That way I get twice the meat for the same amount of time and work it takes to roast one. (You can always freeze any leftovers you don’t use right away.)
Rinse out your bird, making sure to remove any ‘package’ of organ meats the processor included. Pat it dry with a paper towel. Rub it all over with a generous amount of olive oil. Sprinkle heavily with your favorite seasoning. I often use Badia Complete Seasoning, but any combination of herbs, spices, salt and pepper that you like can be used. Be sure and sprinkle seasoning inside the bird’s cavity as well.
Now you have a choice. If you want crispy skin and a quicker cooking time, roast your chicken in an open pan in the oven. If you want chicken that is fall-off-the-bone tender and you have plenty of time, use a crock pot or other slow cooker.
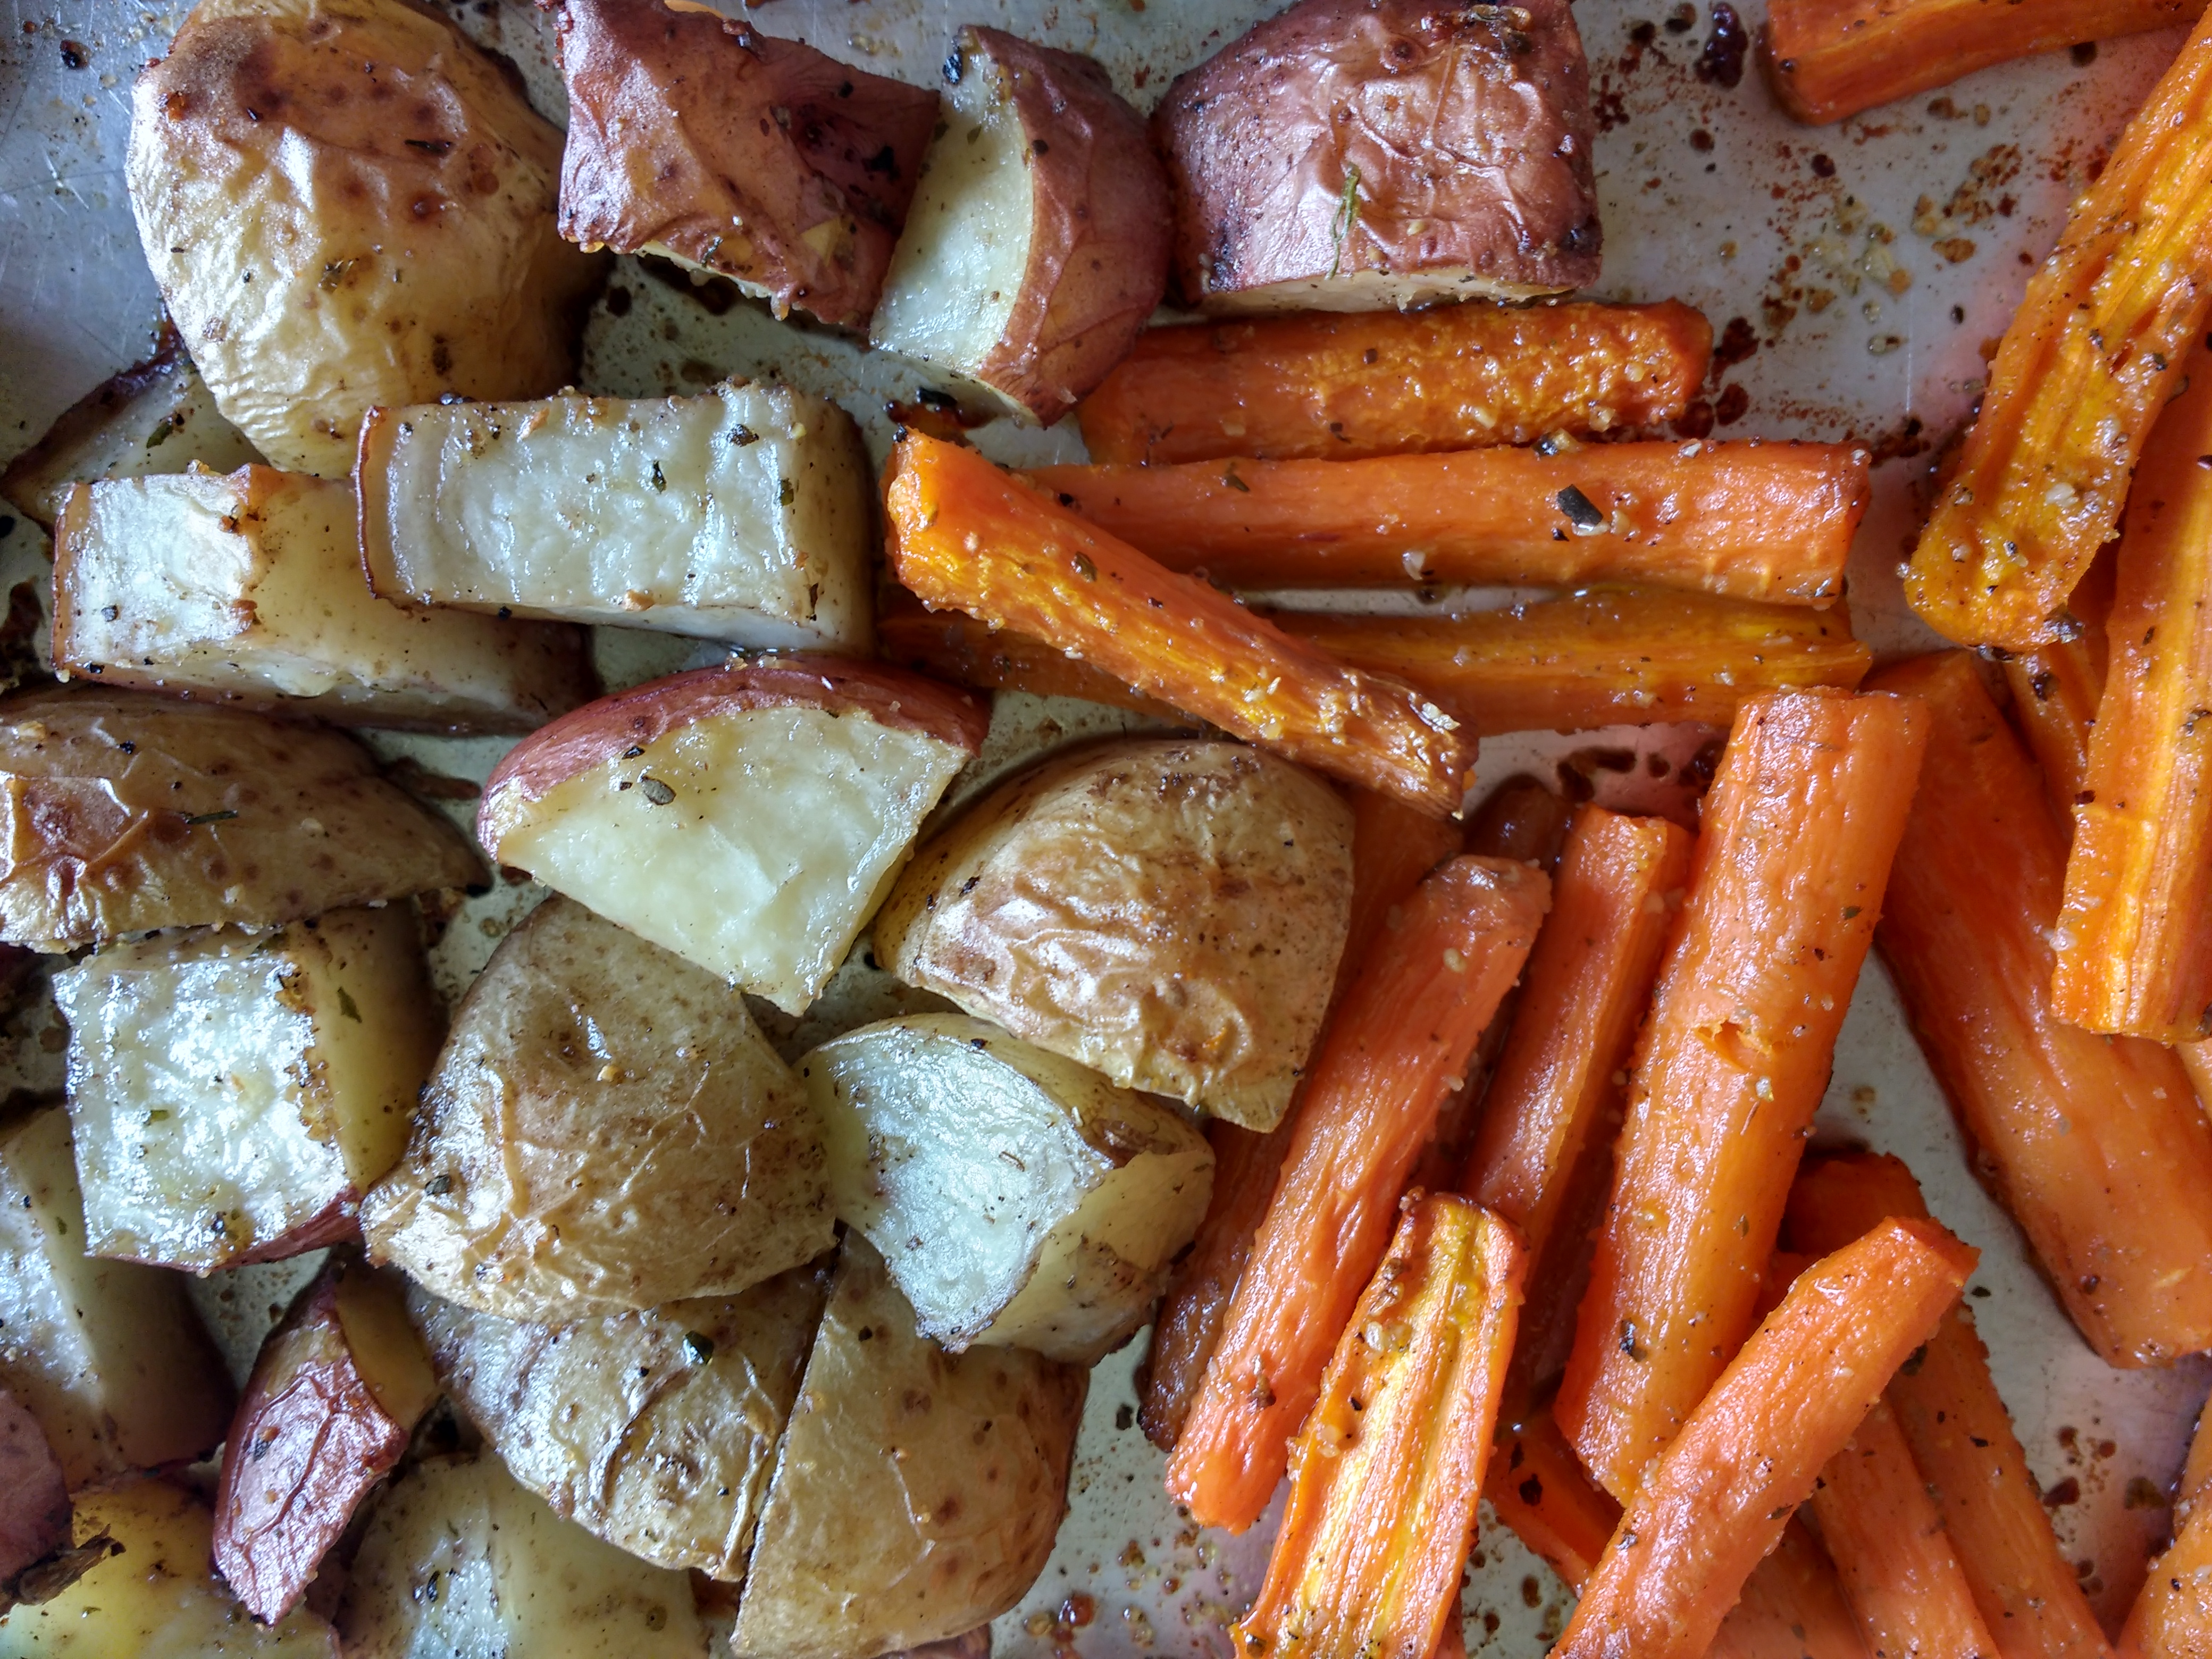
For oven roasting, you don’t have to have a fancy roasting pan. Even a cake pan will work. Just pop your chicken into the pan, breast side up, and place in a 400° oven. Roasting time depends on two things: the size of your bird and how tender you want your dark meat to be. A 4 pound bird will take about an hour, for example. Chicken meat is safe to eat when a meat thermometer says 170° when measuring the thickest part of the thigh. But thigh meat is more tender at 180°, however your breast meat can by dryer. You don’t have to have a thermometer to know when the chicken is done. Juices will be clear when you put a fork into the thigh. If your bird is more than 4 pounds, plan on about 8 minutes of extra of cooking for every pound over 4. (If you want roasted veggies with your chicken, I would cook them separately. Otherwise, they will absorb much of your broth. Cut veggies like carrots, potatoes, Brussel sprouts, cauliflower, and broccoli to a similar size. Drizzle with olive oil, mix around to coat, and sprinkle with your favorite seasoning. The Badia Complete works here, too. Put in the oven for the last 30 minutes of the chicken’s cooking time. I like my veggies to have a little caramelized color on them for max flavor.)
Once your bird is done, (and your kitchen will smell amazing, by the way!), remove the pan from the oven and let the meat sit for 10 to 15 minutes, so the internal juices are reabsorbed by the meat.
And those juices are lovely! A layer of liquid fat will be on top of them, but no worries. Pour all the juices into a container and if you’re not using them right away to make a gravy, put the container into the refrigerator. The fat will solidify enough that you can easily remove it. The bottom juices will congeal like gelatin (because there IS natural gelatin in them), but will quickly remelt when heated.
For a slow cooker, once your bird is seasoned, place it in your slow cooker breast side up. If you have all day (like when you’re leaving in the morning for work), turn the cooker on low, put on the lid, and walk away. By dinner time you will have a delicious meal ready for you. If you want it to take less time, put your cooker on high, which will take closer to 4 hours to cook. For a complete meal, throw in some scrubbed potatoes and carrots, oiled and seasoned, next to your chicken on top. That way the veggies aren’t sitting in those lovely juices!
Chicken and Rice
The first day I roast chicken, we eat some of the meat as is, along with veggies and a starchy side, like couscous or potatoes. But when the bird has been picked on a bit, I take whatever meat is left…and it doesn’t matter if it’s a lot or a little..and make chicken and rice. It’s the perfect way to create another low cost but delicious meal from the leftovers. I call it stretching, and when you have a large family, you learn how to stretch your meals!
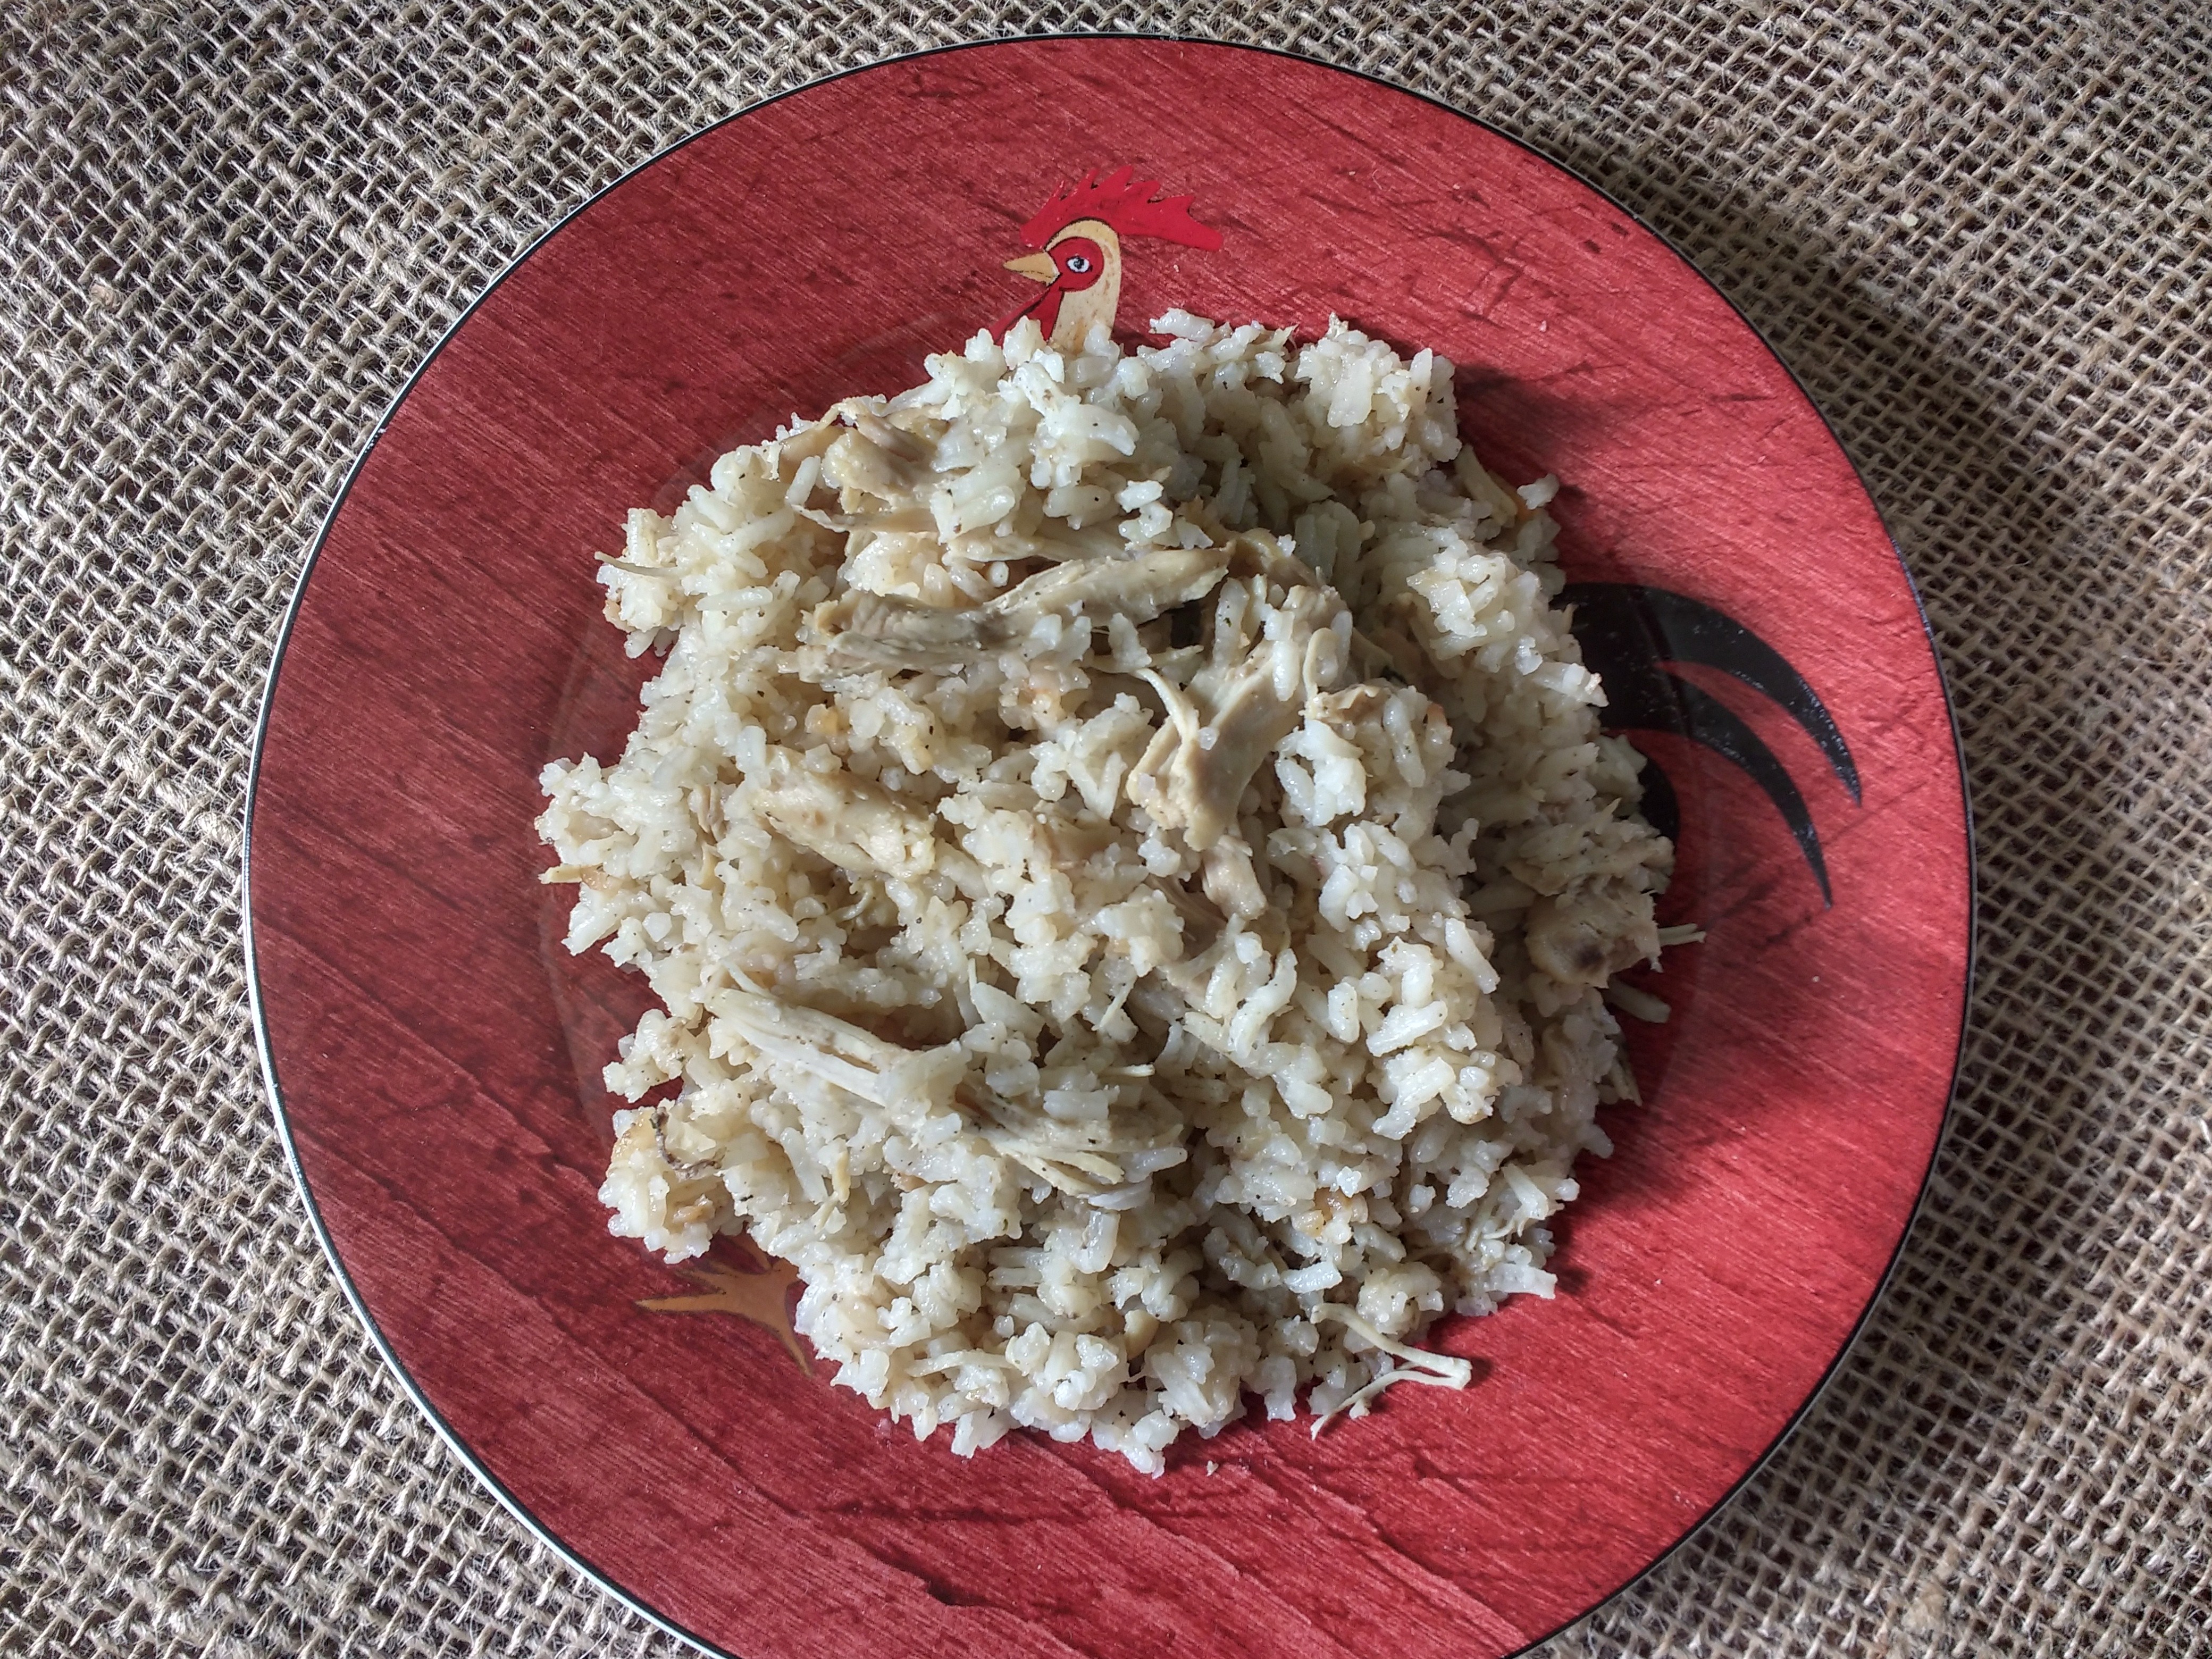
To make chicken and rice, combine in a large pot 3 cups of long grain white rice, whatever bite-sized chicken meat you have (2 cups at least is a good idea), and 4 2/3 cups of broth. (The amount of liquid will depend on how much and what kind of rice you use.) I take whatever broth is leftover from my roasted chicken and make up the difference with store bought broth. (From two birds, I average about 2 cups of amazing broth.) Make sure the liquid for the rice is seasoned enough, or your rice will be bland. You can also jazz it up at this point if you like, adding some special Sazon made for yellow rice, or add other seasonings to suit your taste. You can even toss in some frozen peas.
Once the rice, chicken and broth are combined, get your pot simmering. Give it one final good stir, including scraping along the bottom in case your rice wants to stick, put the lid back on, then turn it down to low for 20 minutes. No need to open the lid and look in while cooking. But it’s very important your rice is just simmering, not hard boiling. After 20 minutes, pull the pot off the heat and wait 5 minutes, without removing the lid. After 5 minutes, take off the lid and fluff the rice. You’re ready to eat! I always have fresh veggies and fruit on the side for a complete meal.
Don’t Throw These Away!
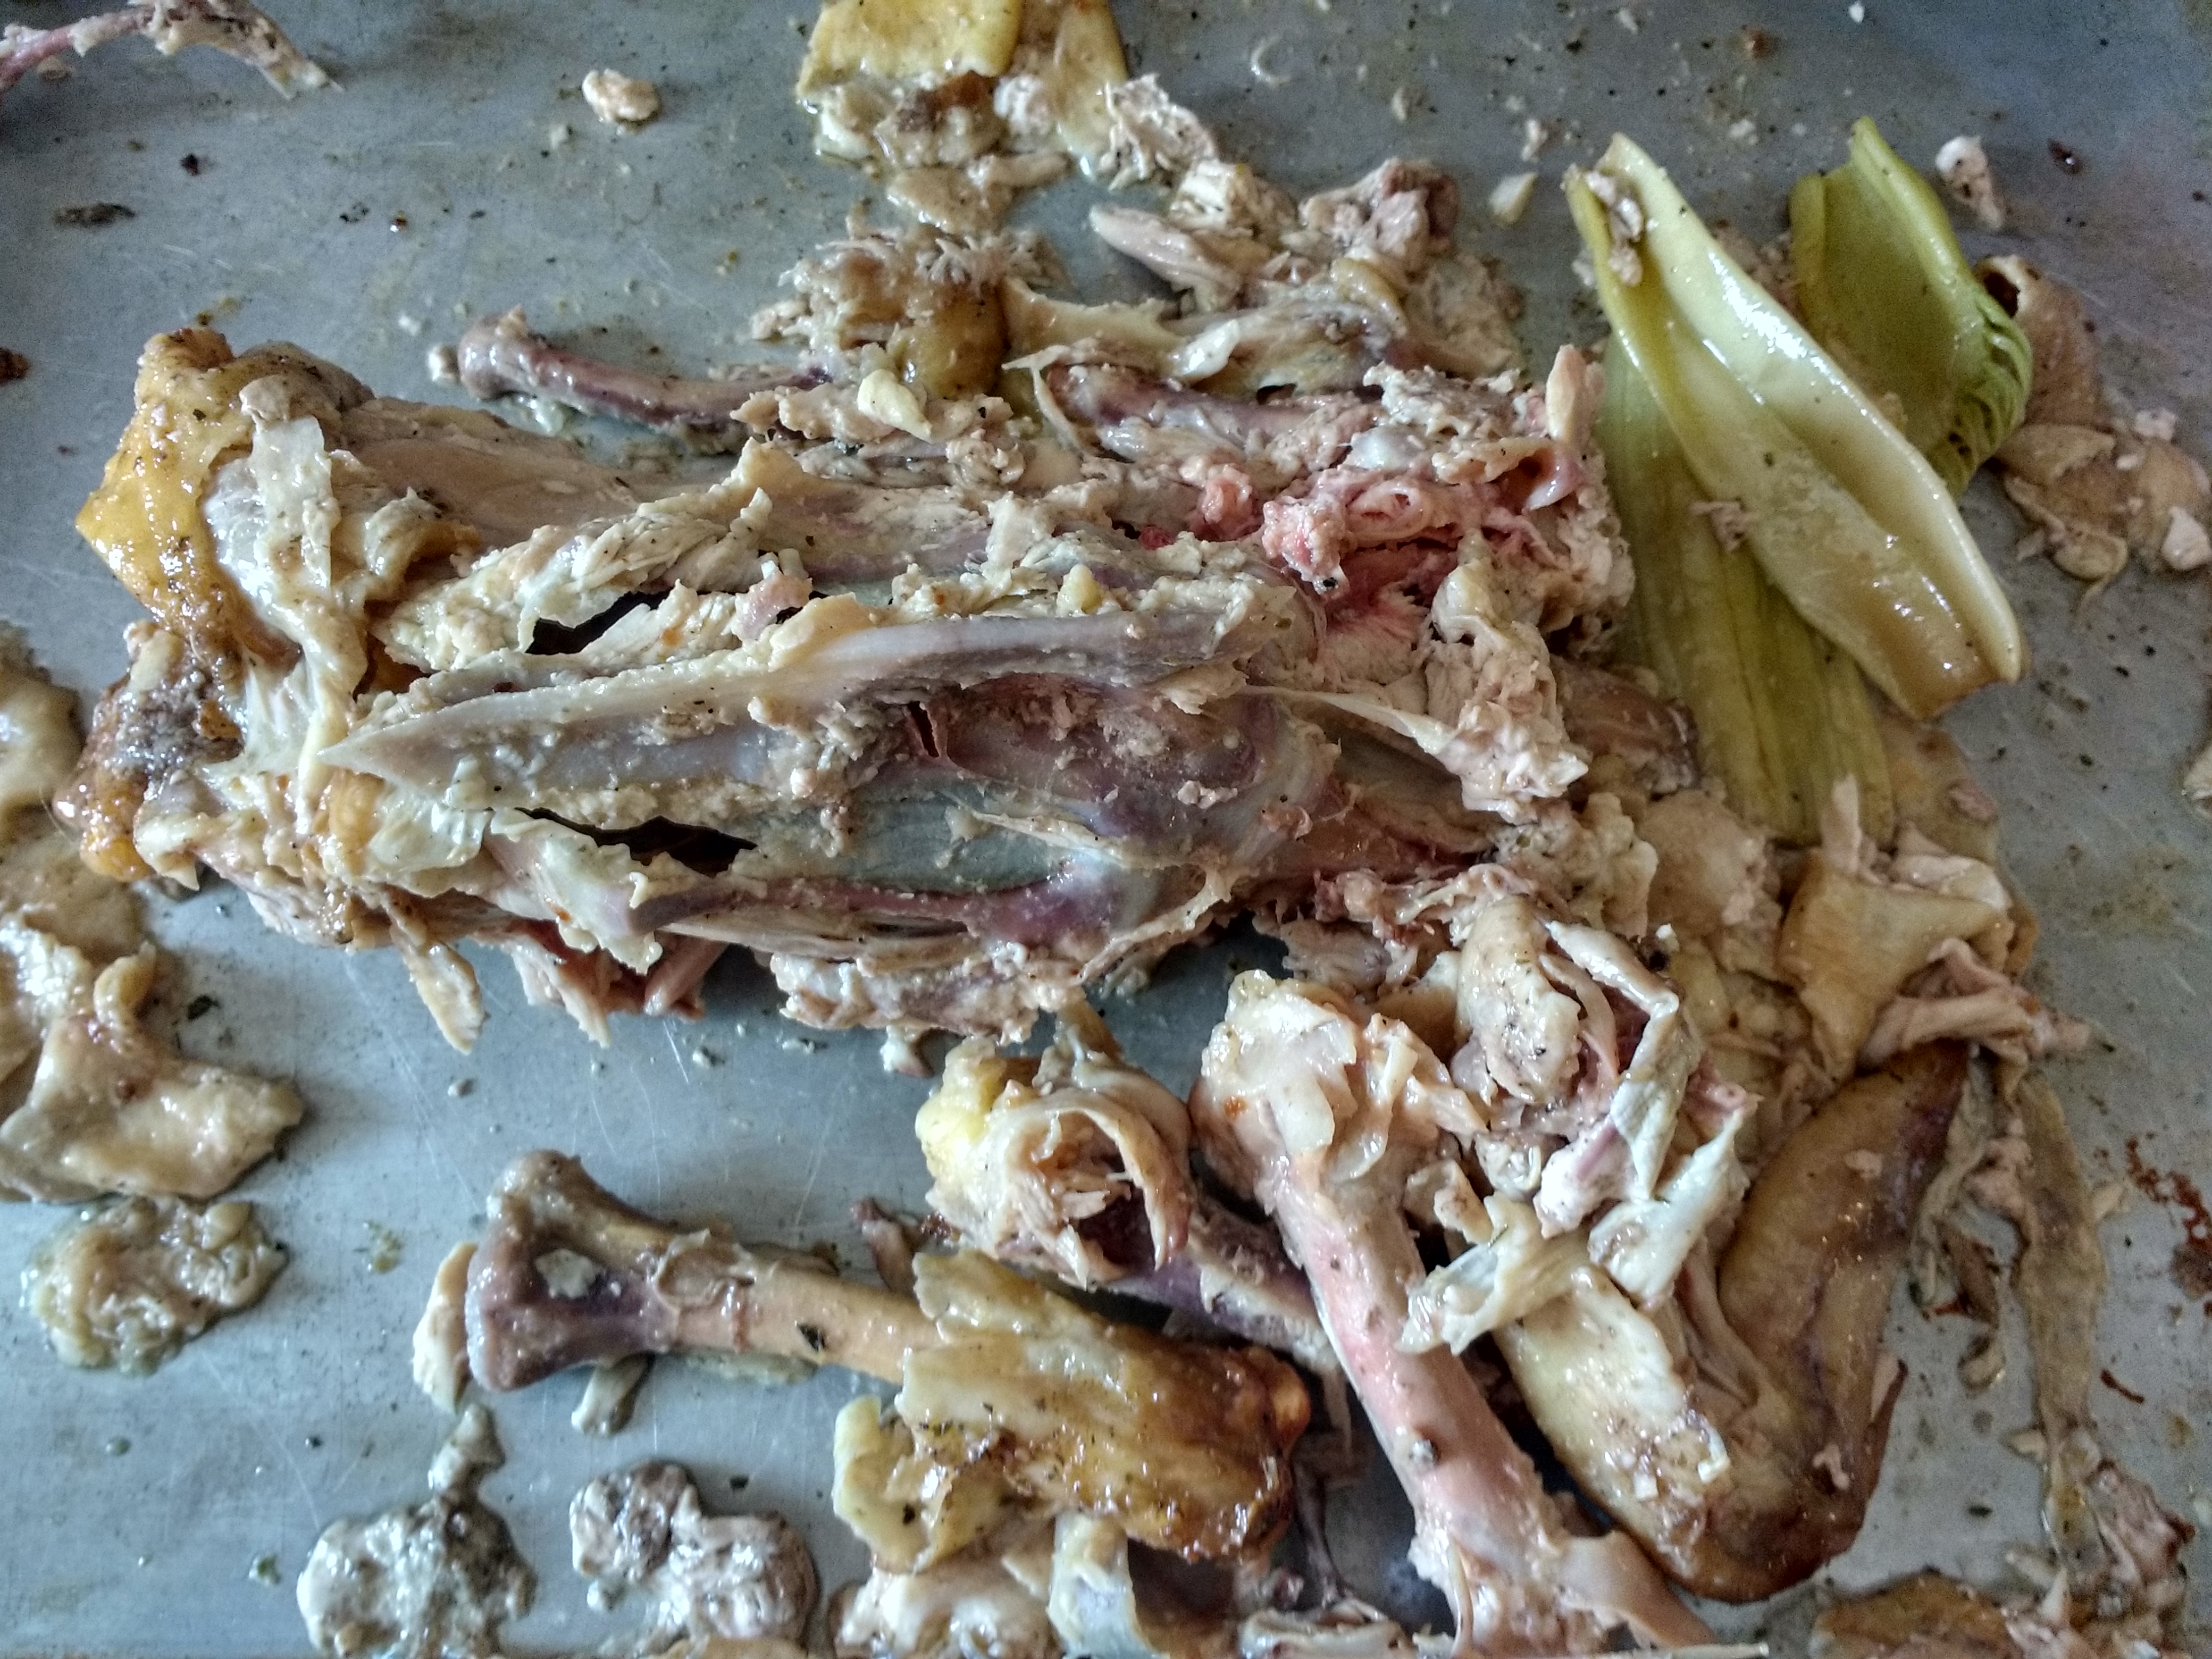
One man’s trash is another man’s treasure. These bones, when boiled in salted water, make a lovely, meaty broth for a delicious soup. Bone broths are a healthy way to build up your own bones as well!
Comments 2
Saw you onTV today and decided to try your slow cooker chicken. The chicken worked out fine. Now I’ll try the rice tomorrow. I have been cooking my chicken in the microwave. This turns out good but little broth.
I look forward to trying more of your recipes.
Thanks for sharing.
Author
Charlotte,
I’m so glad you enjoyed the chicken! Tomorrow, (April 22) I’m on Daytime again and I’ll be sharing another recipe you might like. It’s a chicken recipe from Puerto Rico, and though I use a pot on the stove to make mine, you could put all the ingredients into your slow cooker and make it that way. In fact, I’m thinking of trying it that way myself soon.
Thanks for watching!
Blessings,
Julie