The first official day of fall is upon us
and whether it feels that way where you live or not, the seasons are shifting. Apple orchards here in the southern Appalachian Mountains are filled with fruit and nothing says fall more than delicious, spicy apple treats coming out of the oven. Every year I share apple recipes, but there are so many to choose from—there are just so many ways to enjoy apples!
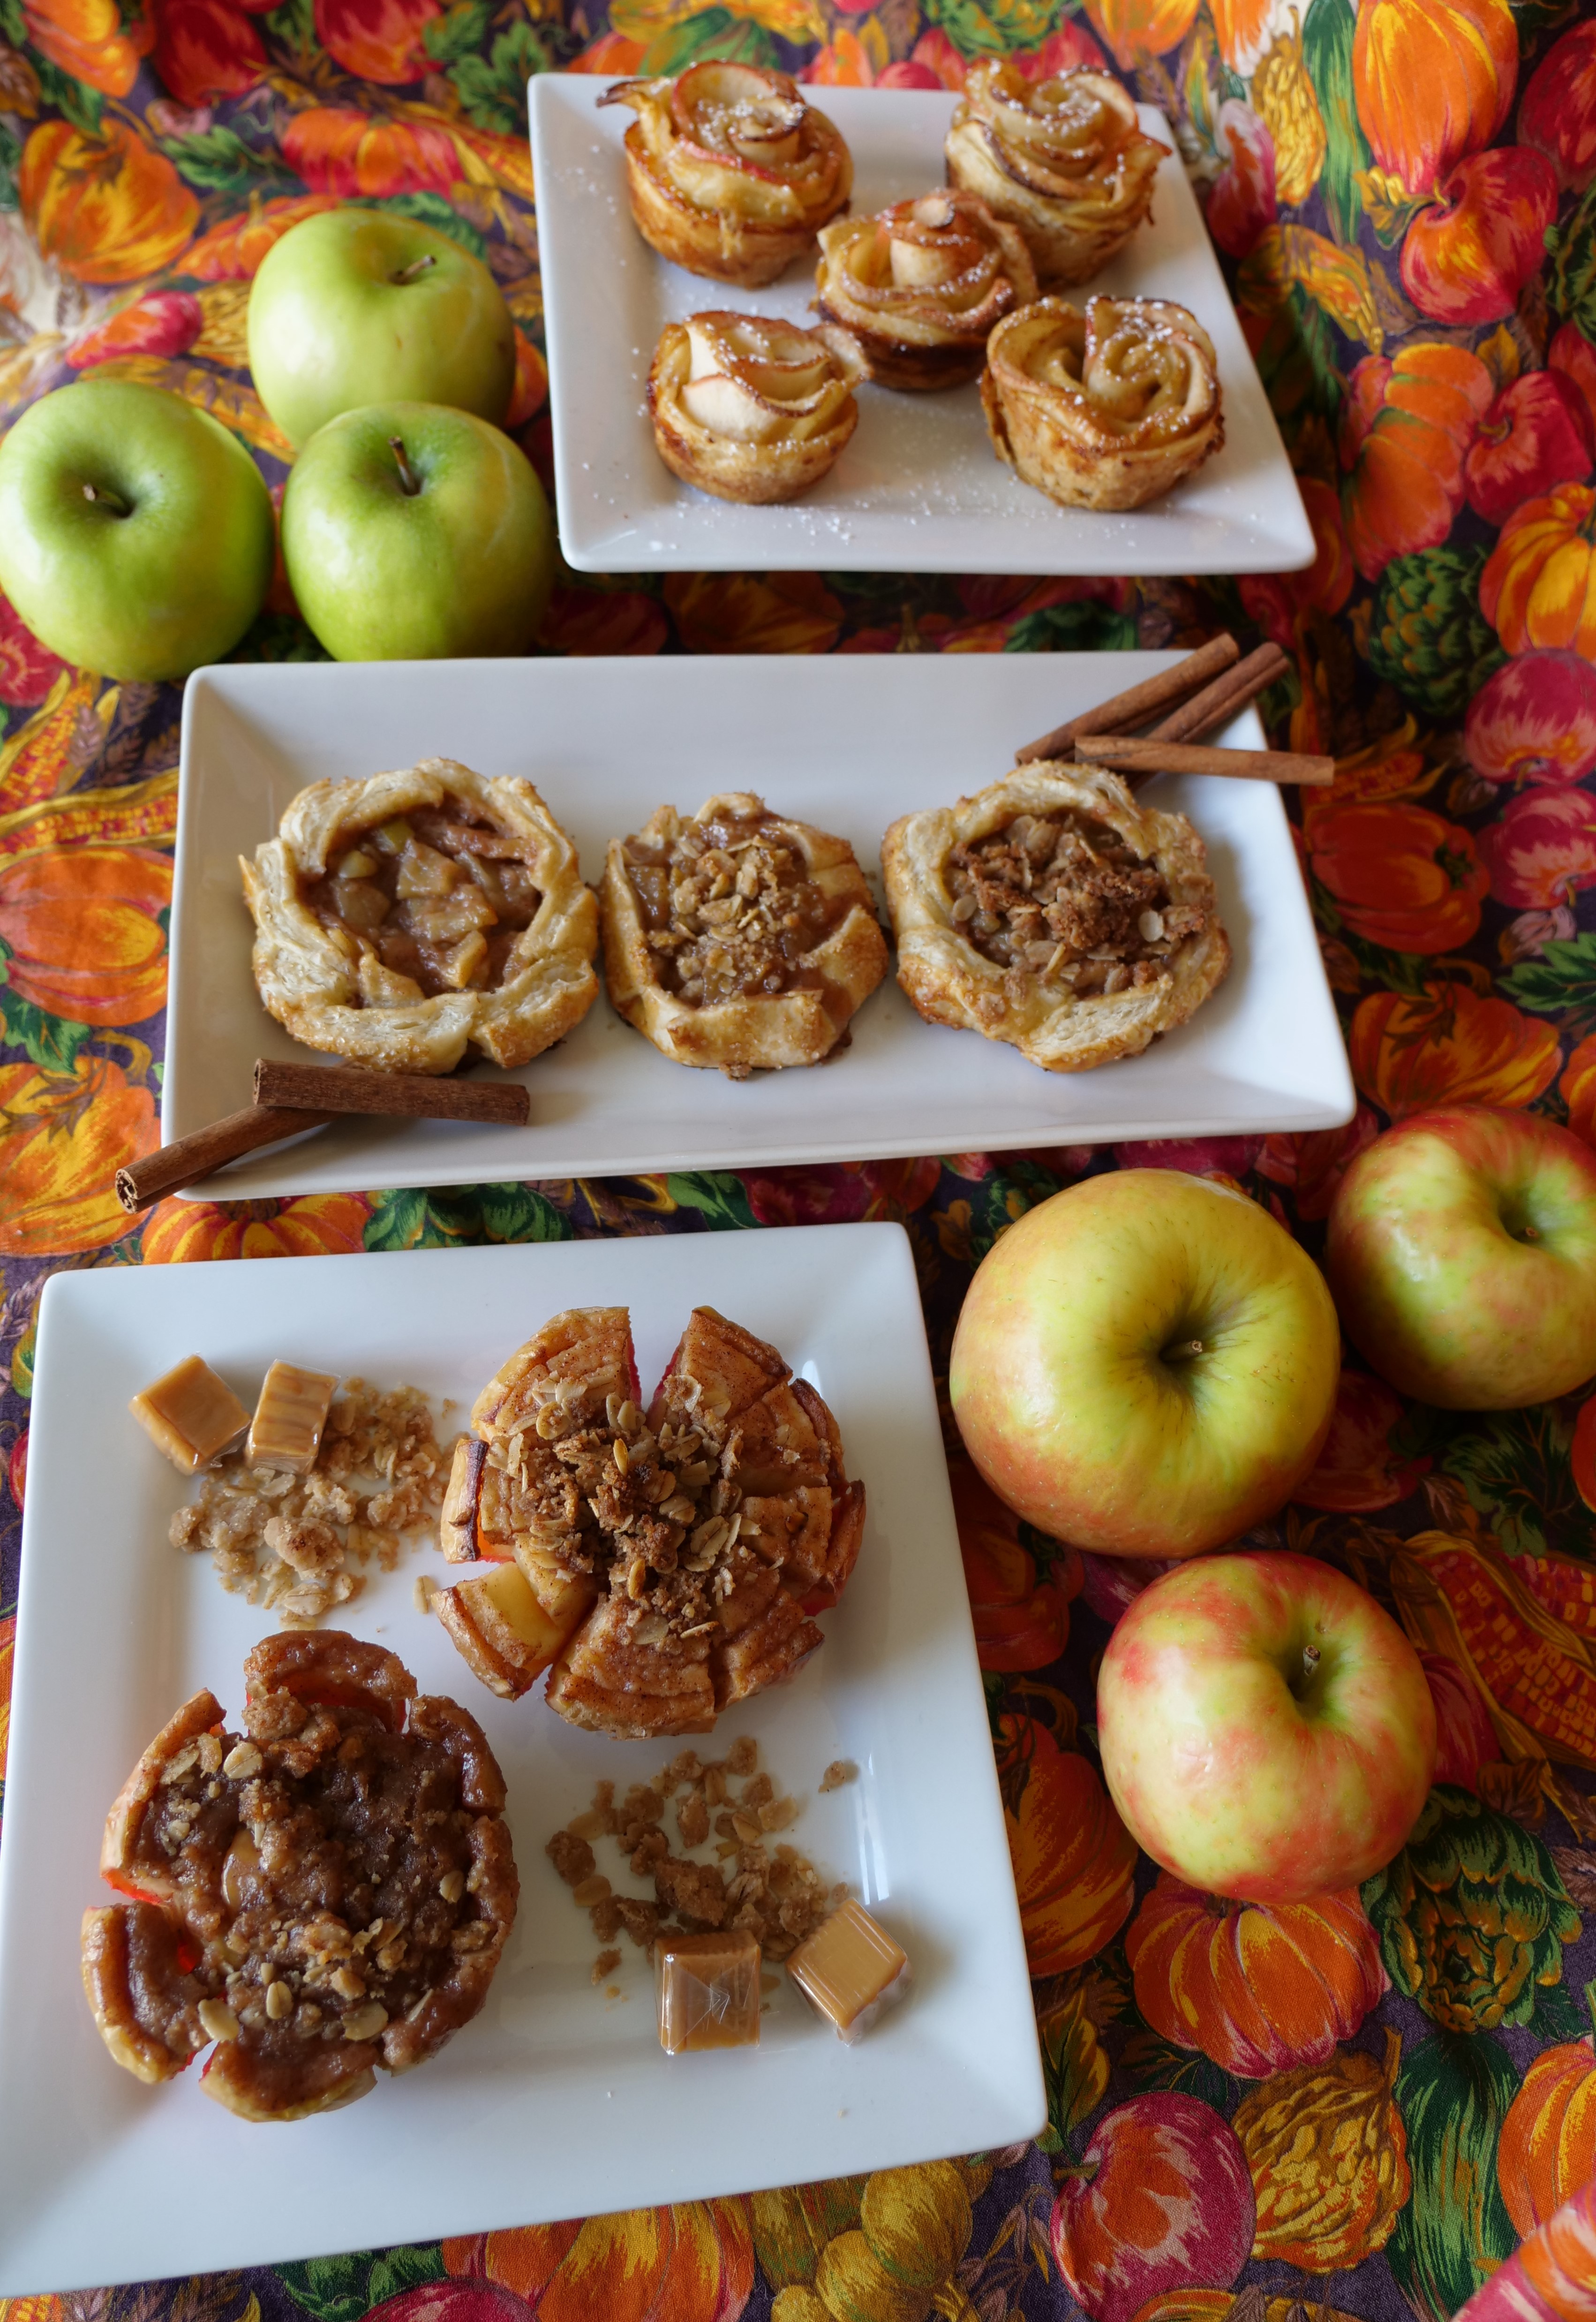
Here are a few recipes to help you get into the swing of fall and you may like them so much, you’ll end up using them year ‘round.

Apple Blossoms
You could just call them mini Apple tarts, for that is what they are. (One of my daughters said it looked like an apple nest.) I start with making the filling and precooking it in the microwave, a real time saver.
Microwave Apple Filling
Combine in a glass bowl:
4 cups of sliced and chopped apples (cutting them small makes cooking time shorter)
1/3 cup white sugar
2 tablespoons AP flour
1 teaspoon apple pie spice
A pinch of salt
A squeeze of fresh lemon juice
1 tablespoon unsalted butter
Stir well so the apple slices are evenly coated. Cook covered, on high, in the microwave for 5 minutes. Take out, stir, and check to see if apples are fork tender. If not, cook another 2 minutes, recheck, and keep repeating until apples are tender. In my microwave, this took a total of 7 minutes, but the time depends on the firmness of your apples, how thinly they were cut, and the power of your microwave. Once the filling is cooked, you can let it cool and even put it in the refrigerator, if you want to make the filling well in advance.
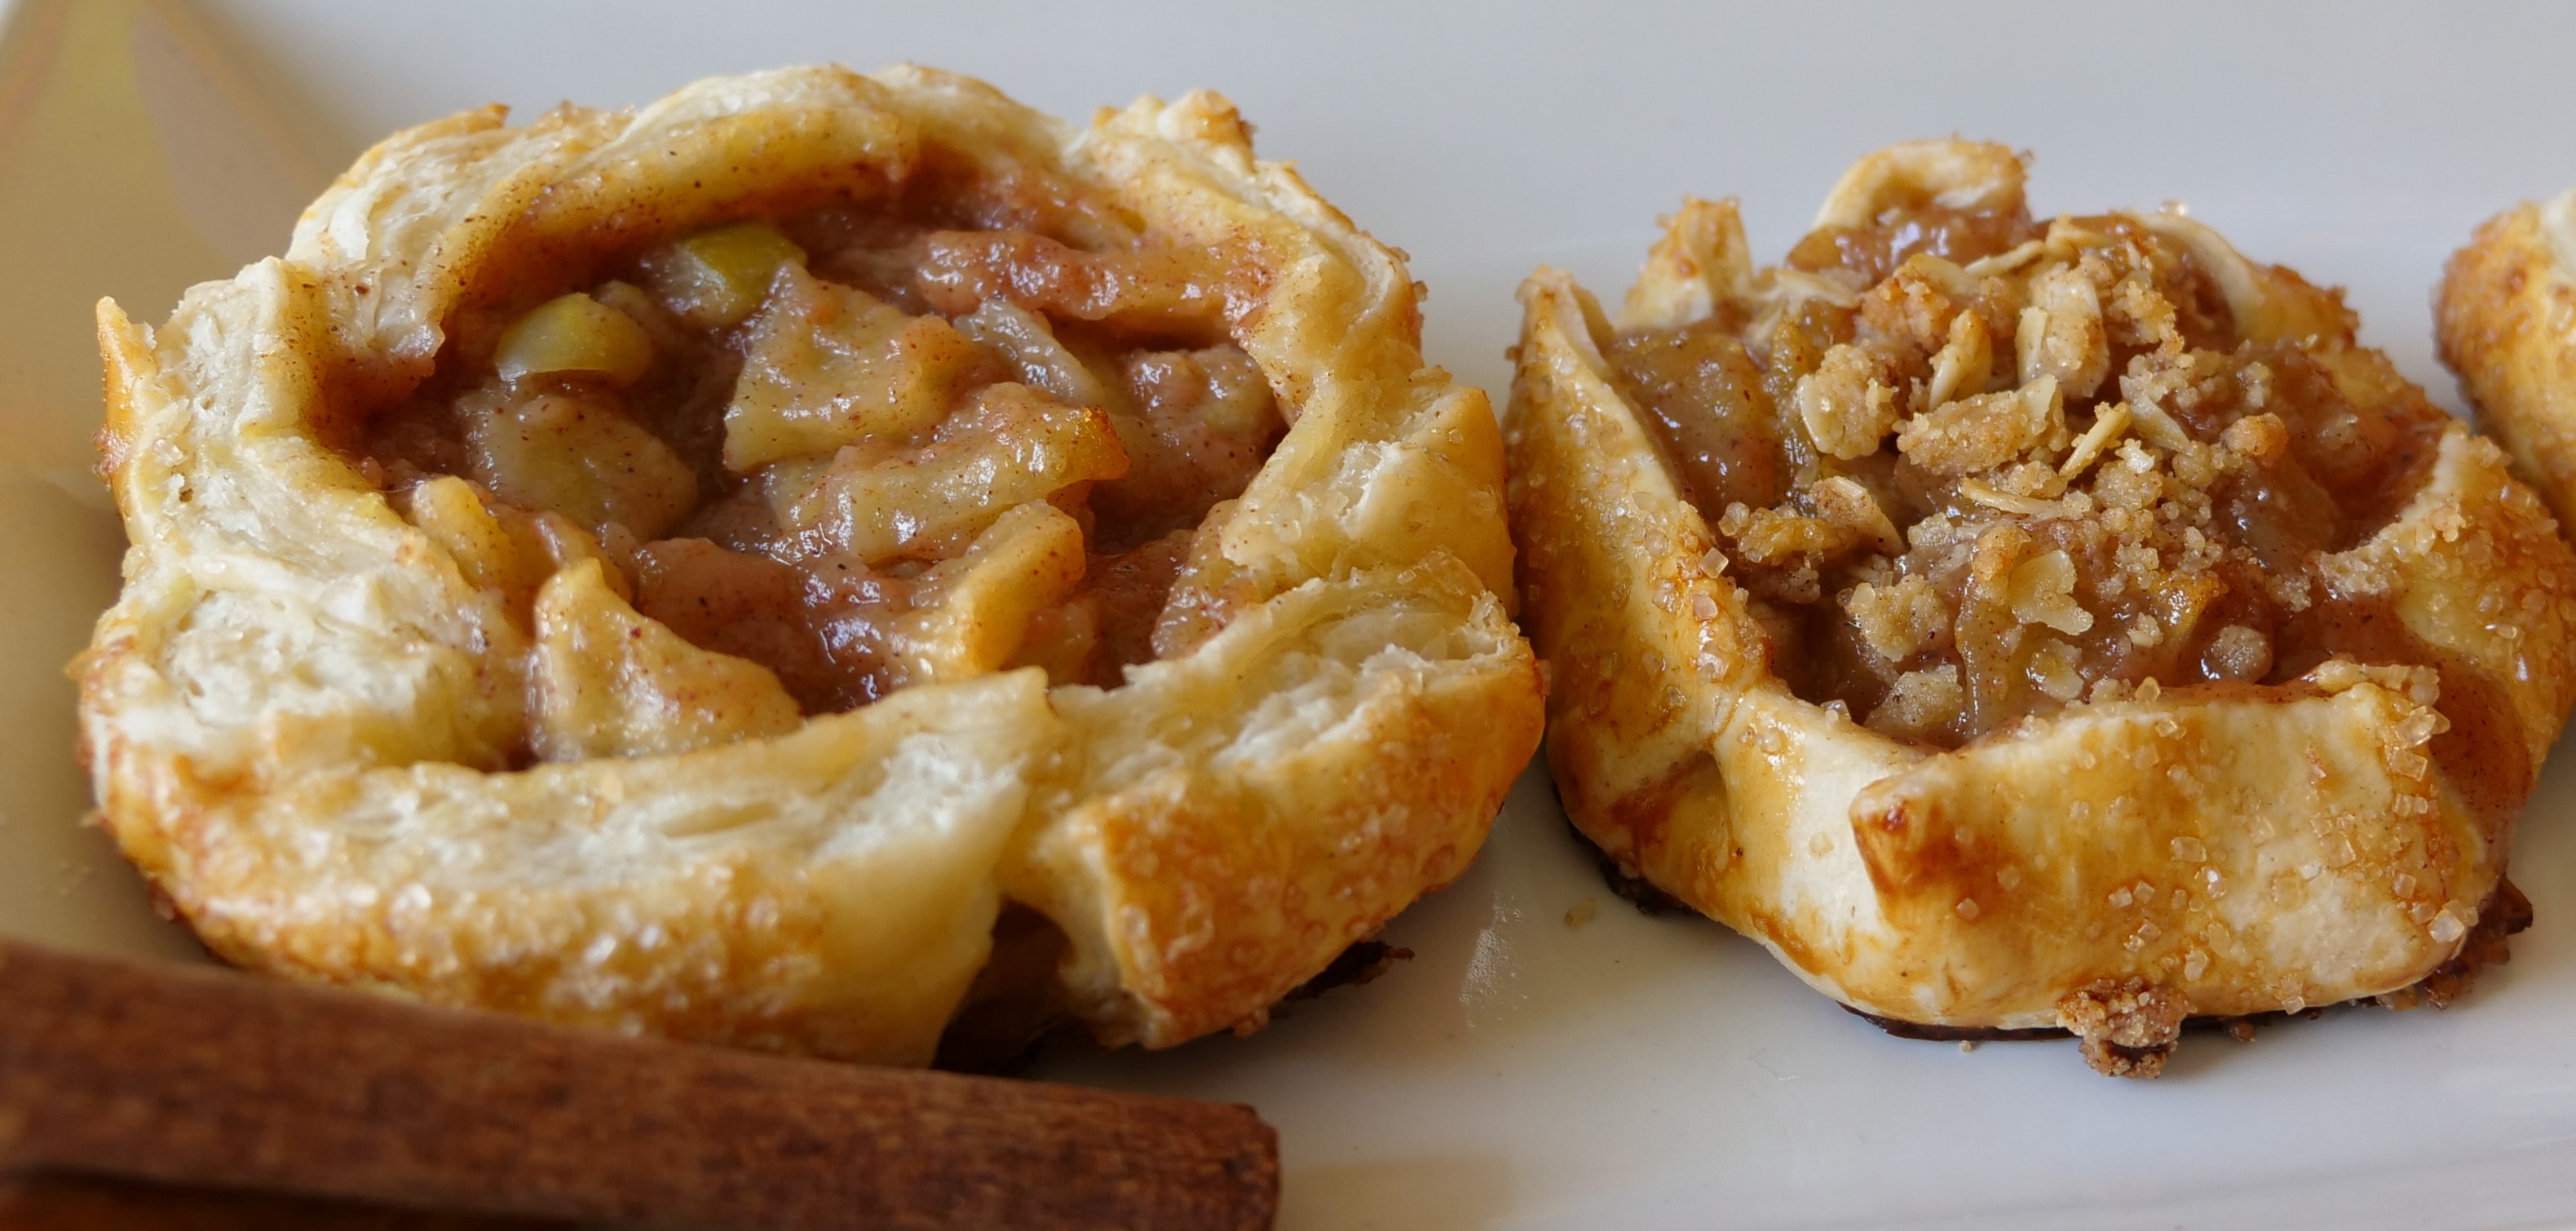
The best version of this mini tart uses puff pastry, found frozen in sheets in your frozen dessert section of your grocery store. Set the frozen dough out of its packaging for about 40 minutes, so it’s still cold but easy to use. Cut out circles, using a circle cutter or a paring knife. Mine aren’t quite 5 inches in diameter. But any size is fine.
Put your filling in the center of each circle, leaving at least an inch around the edge. Brush the edge with an egg wash (I like to use an egg yolk mixed with cream). Cut small straight cuts to form ‘tabs’ that you then bring up, one at time, and overlap the edge with the previous tab, pinching them together and working your way around the tart. It’s supposed to look rustic, so focus on getting that edge to come up over the side of the filling.
Put a little more egg wash on the pleated sides, sprinkle with raw or sanding sugar, and if desired, sprinkle a generous portion of streusel on the top. For the streusel, simply mix together and cook for a minute in the microwave:
2/3 cup AP flour
1 cup old fashioned oats
2/3 cup brown sugar
5 tablespoons unsalted butter, melted
1 teaspoon ground cinnamon
1 pinch of salt
Once the tarts are ready to go, bake at 375 degrees for 25 minutes, or until the puff pastry is golden and cooked through.
You can use pie crust and follow the same procedure, though I just pleated and pinched the sides instead of cutting them to make tabs. Bake the same way, until crust is golden brown.
You could serve these as is, warm from the oven, or add a little vanilla ice cream.
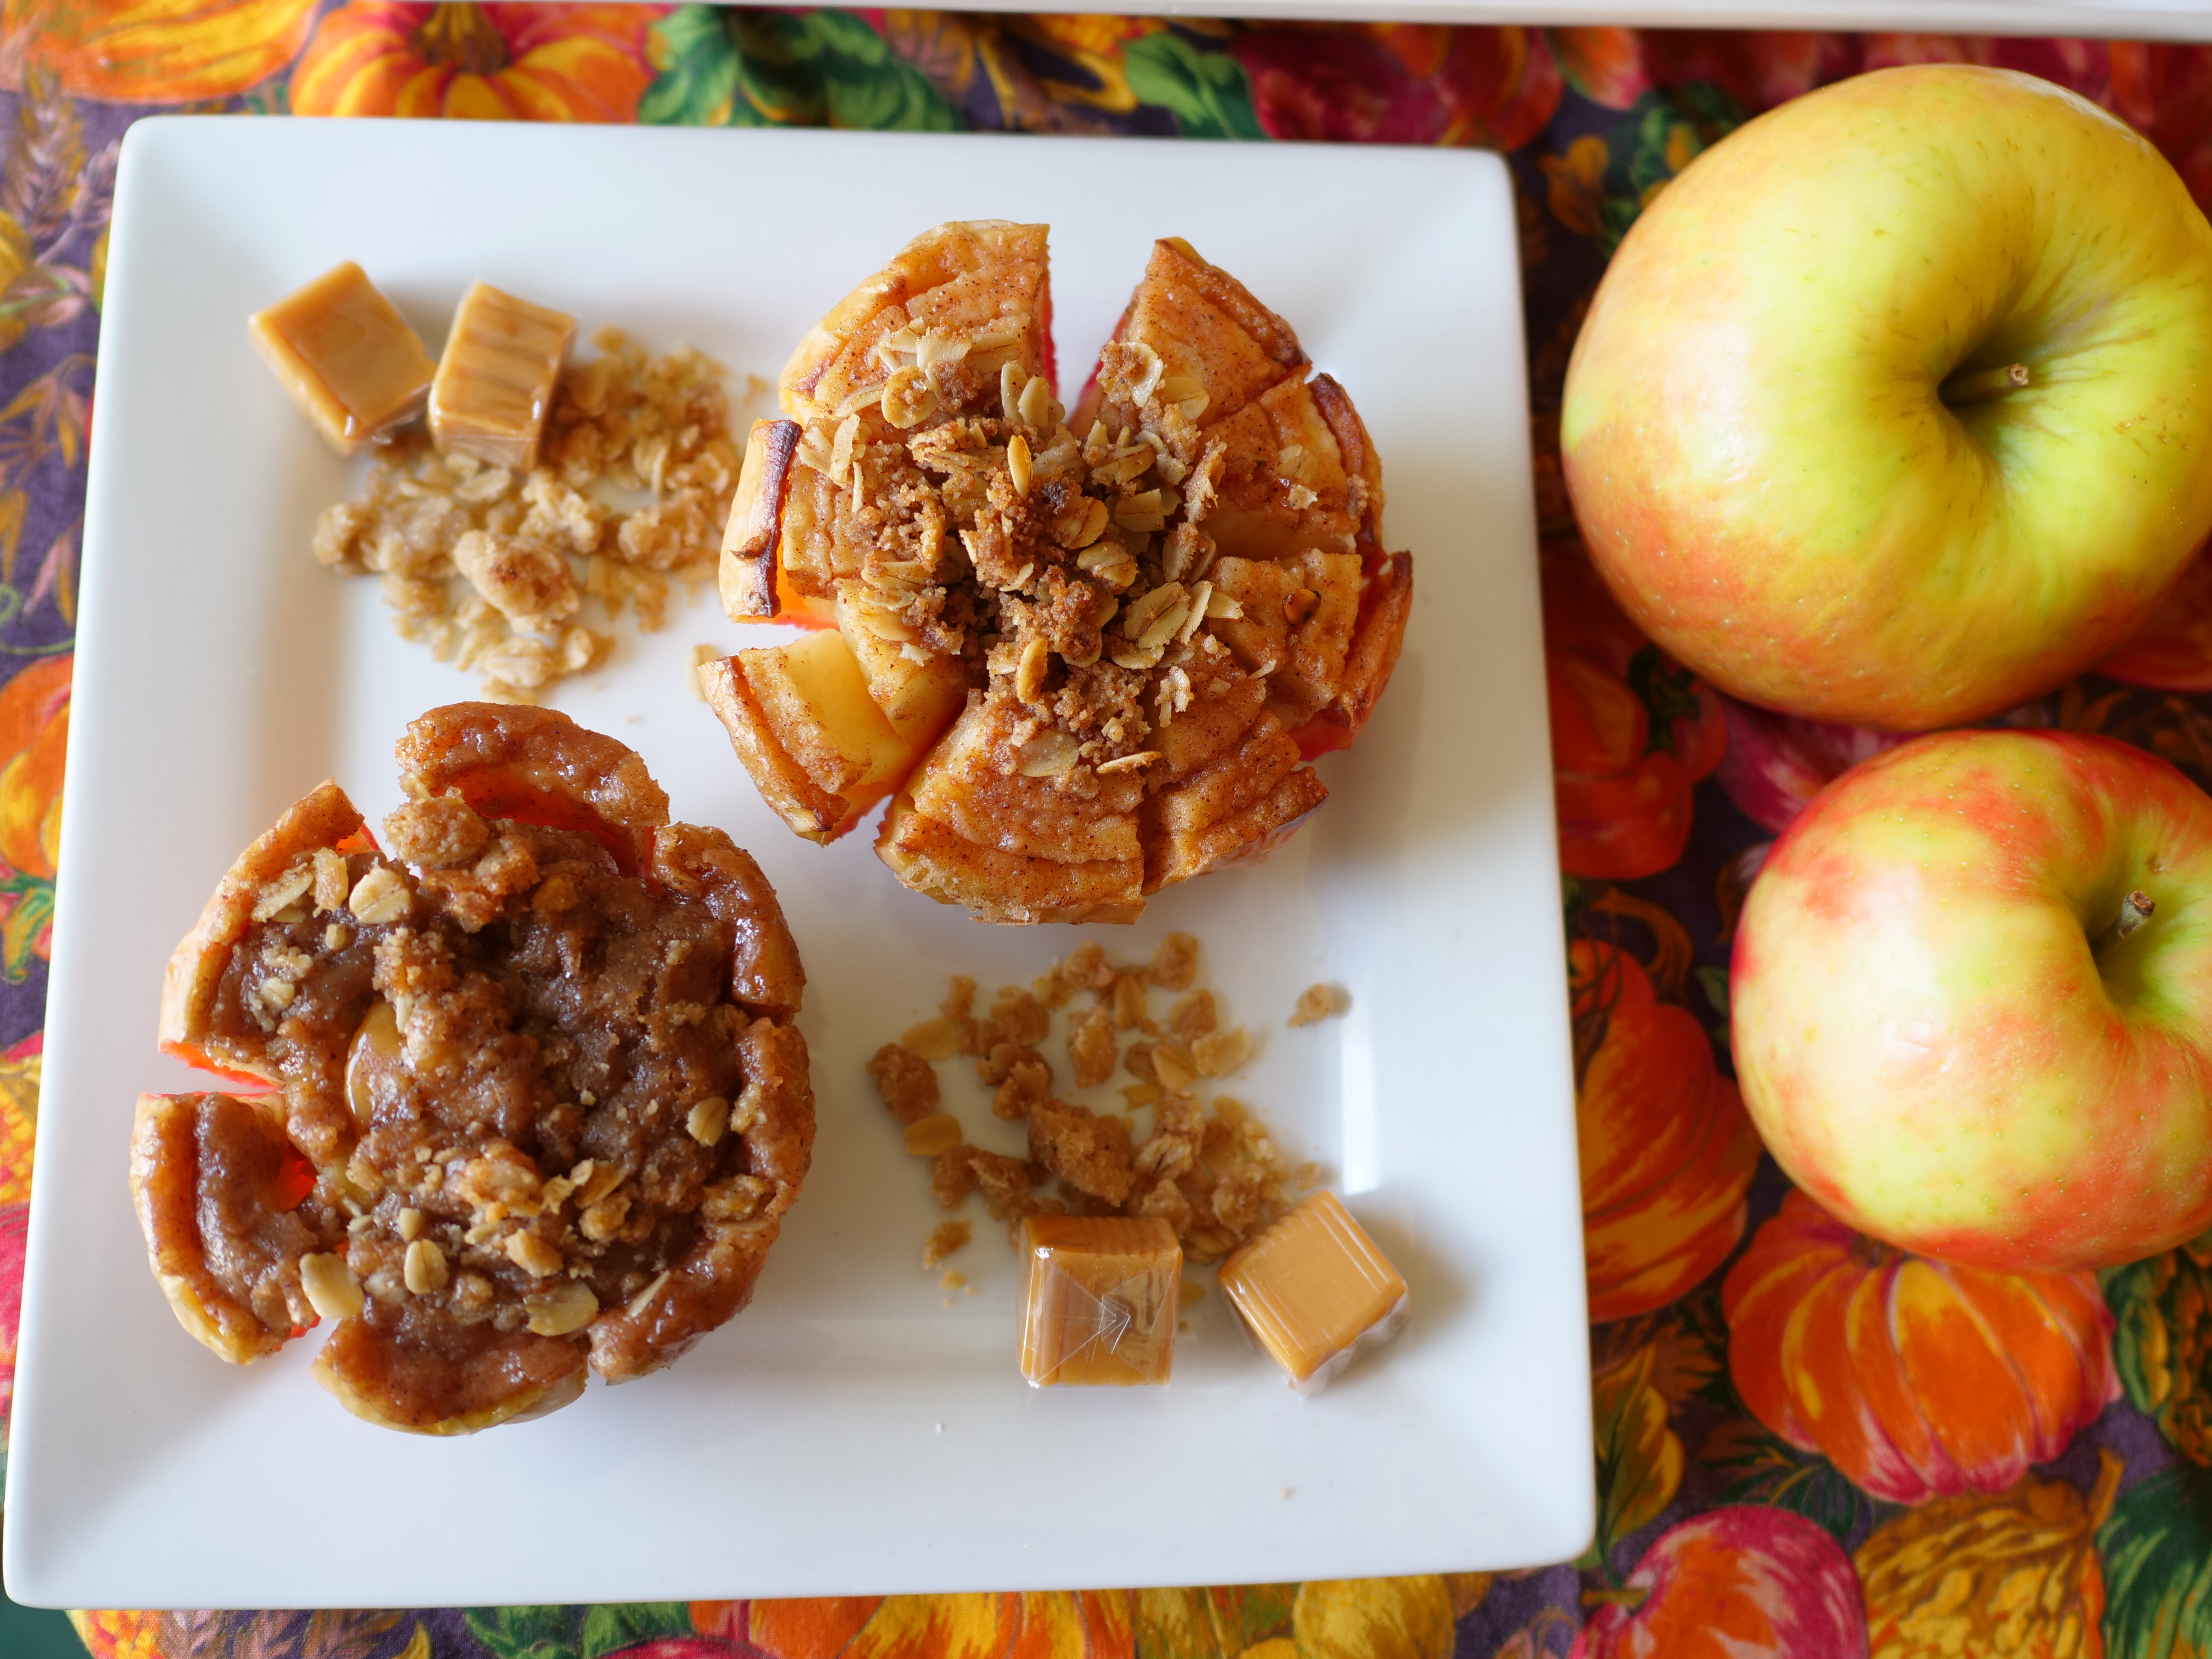
Bloomin’ Baked Apples
Here’s a link to the recipe for this fun and unique treat. It took my apples at least 45 minutes to cook, but they were huge, honeycrisp apples. The first ones I made were granny smith and I learned that if you don’t make the required cuts deep enough, the apple won’t ‘bloom’ out. (I also learned that granny smith peels, once baked, look ugly. But they taste just fine.)
To make my cuts, I used a variety of tools so I could fit 2 circles inside the apple. Biscuit cutters, round cookie cutters, large circle cutters, and round choppers could all be used, and of course, a good paring knife. I would use the paring knife to make my circle cuts deeper regardless.
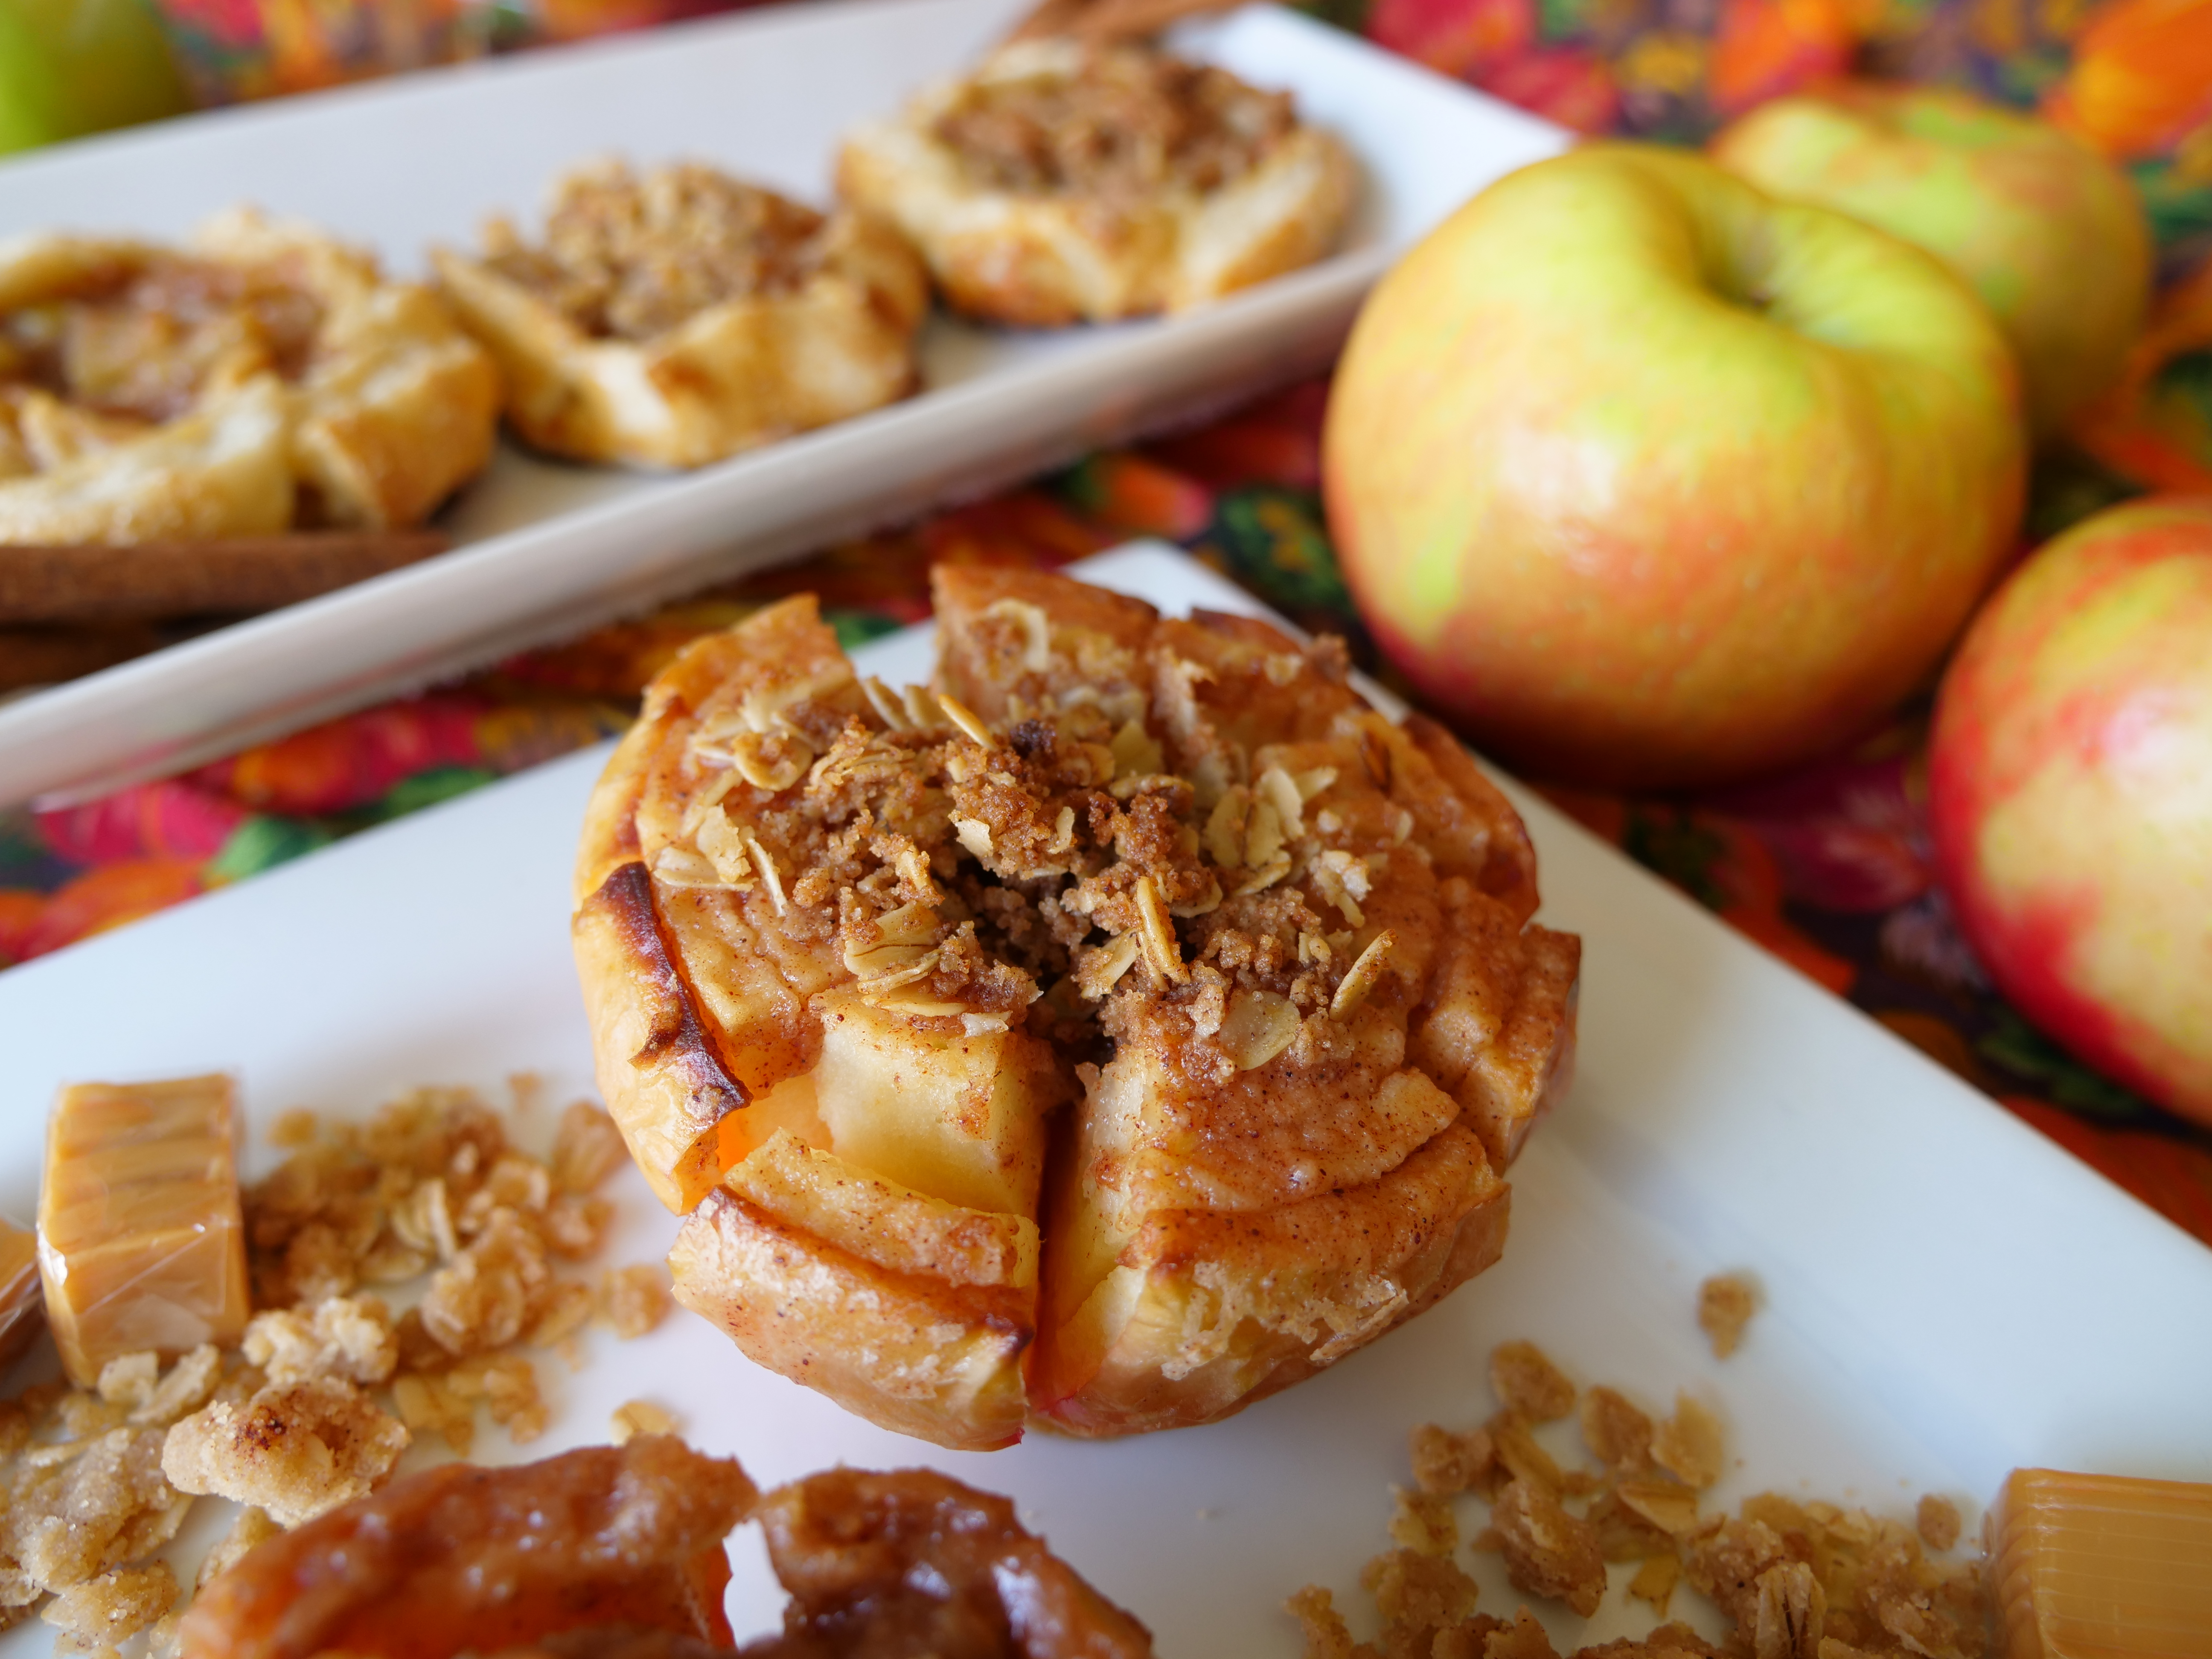
For the apple prep, you can use a melted butter, white sugar and spice mixture, or do a thicker version with brown sugar, flour, butter and spice. I added a pinch of salt to mine, and also some of my streusel topping to the core and sprinkled on top before baking to give the baked apple some needed crunch. If you aren’t a caramel fan, you can leave that part out.
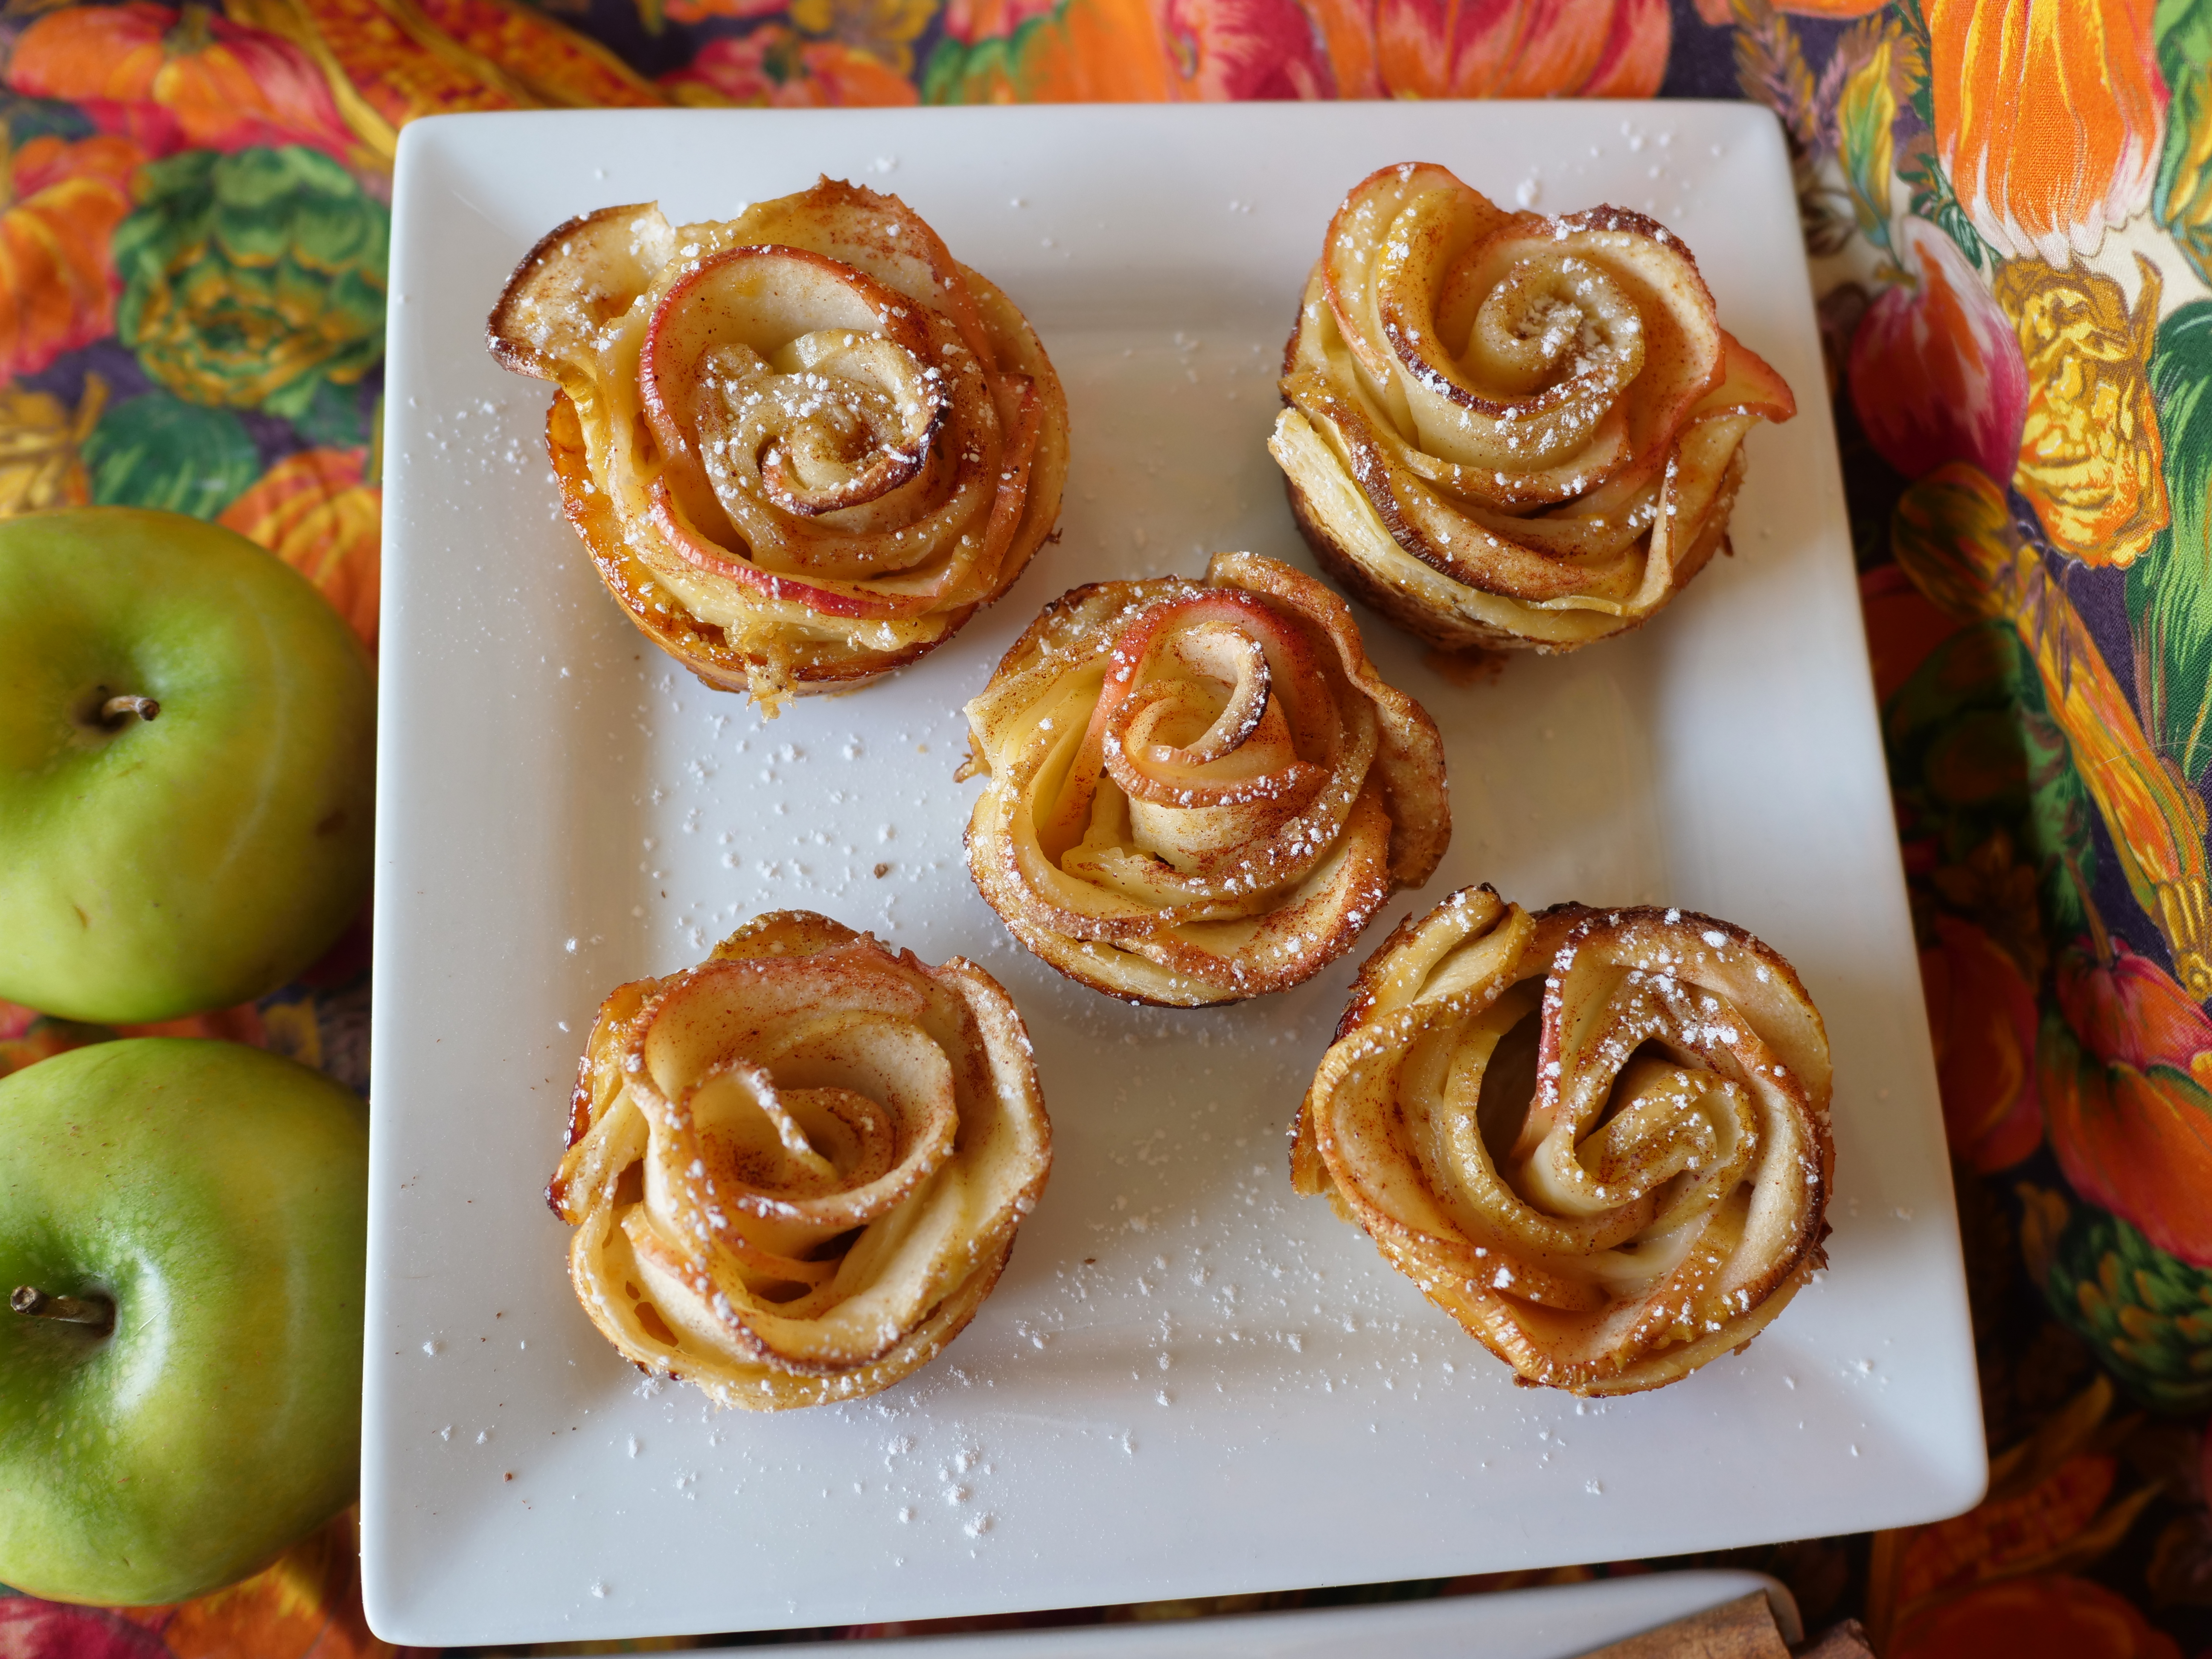
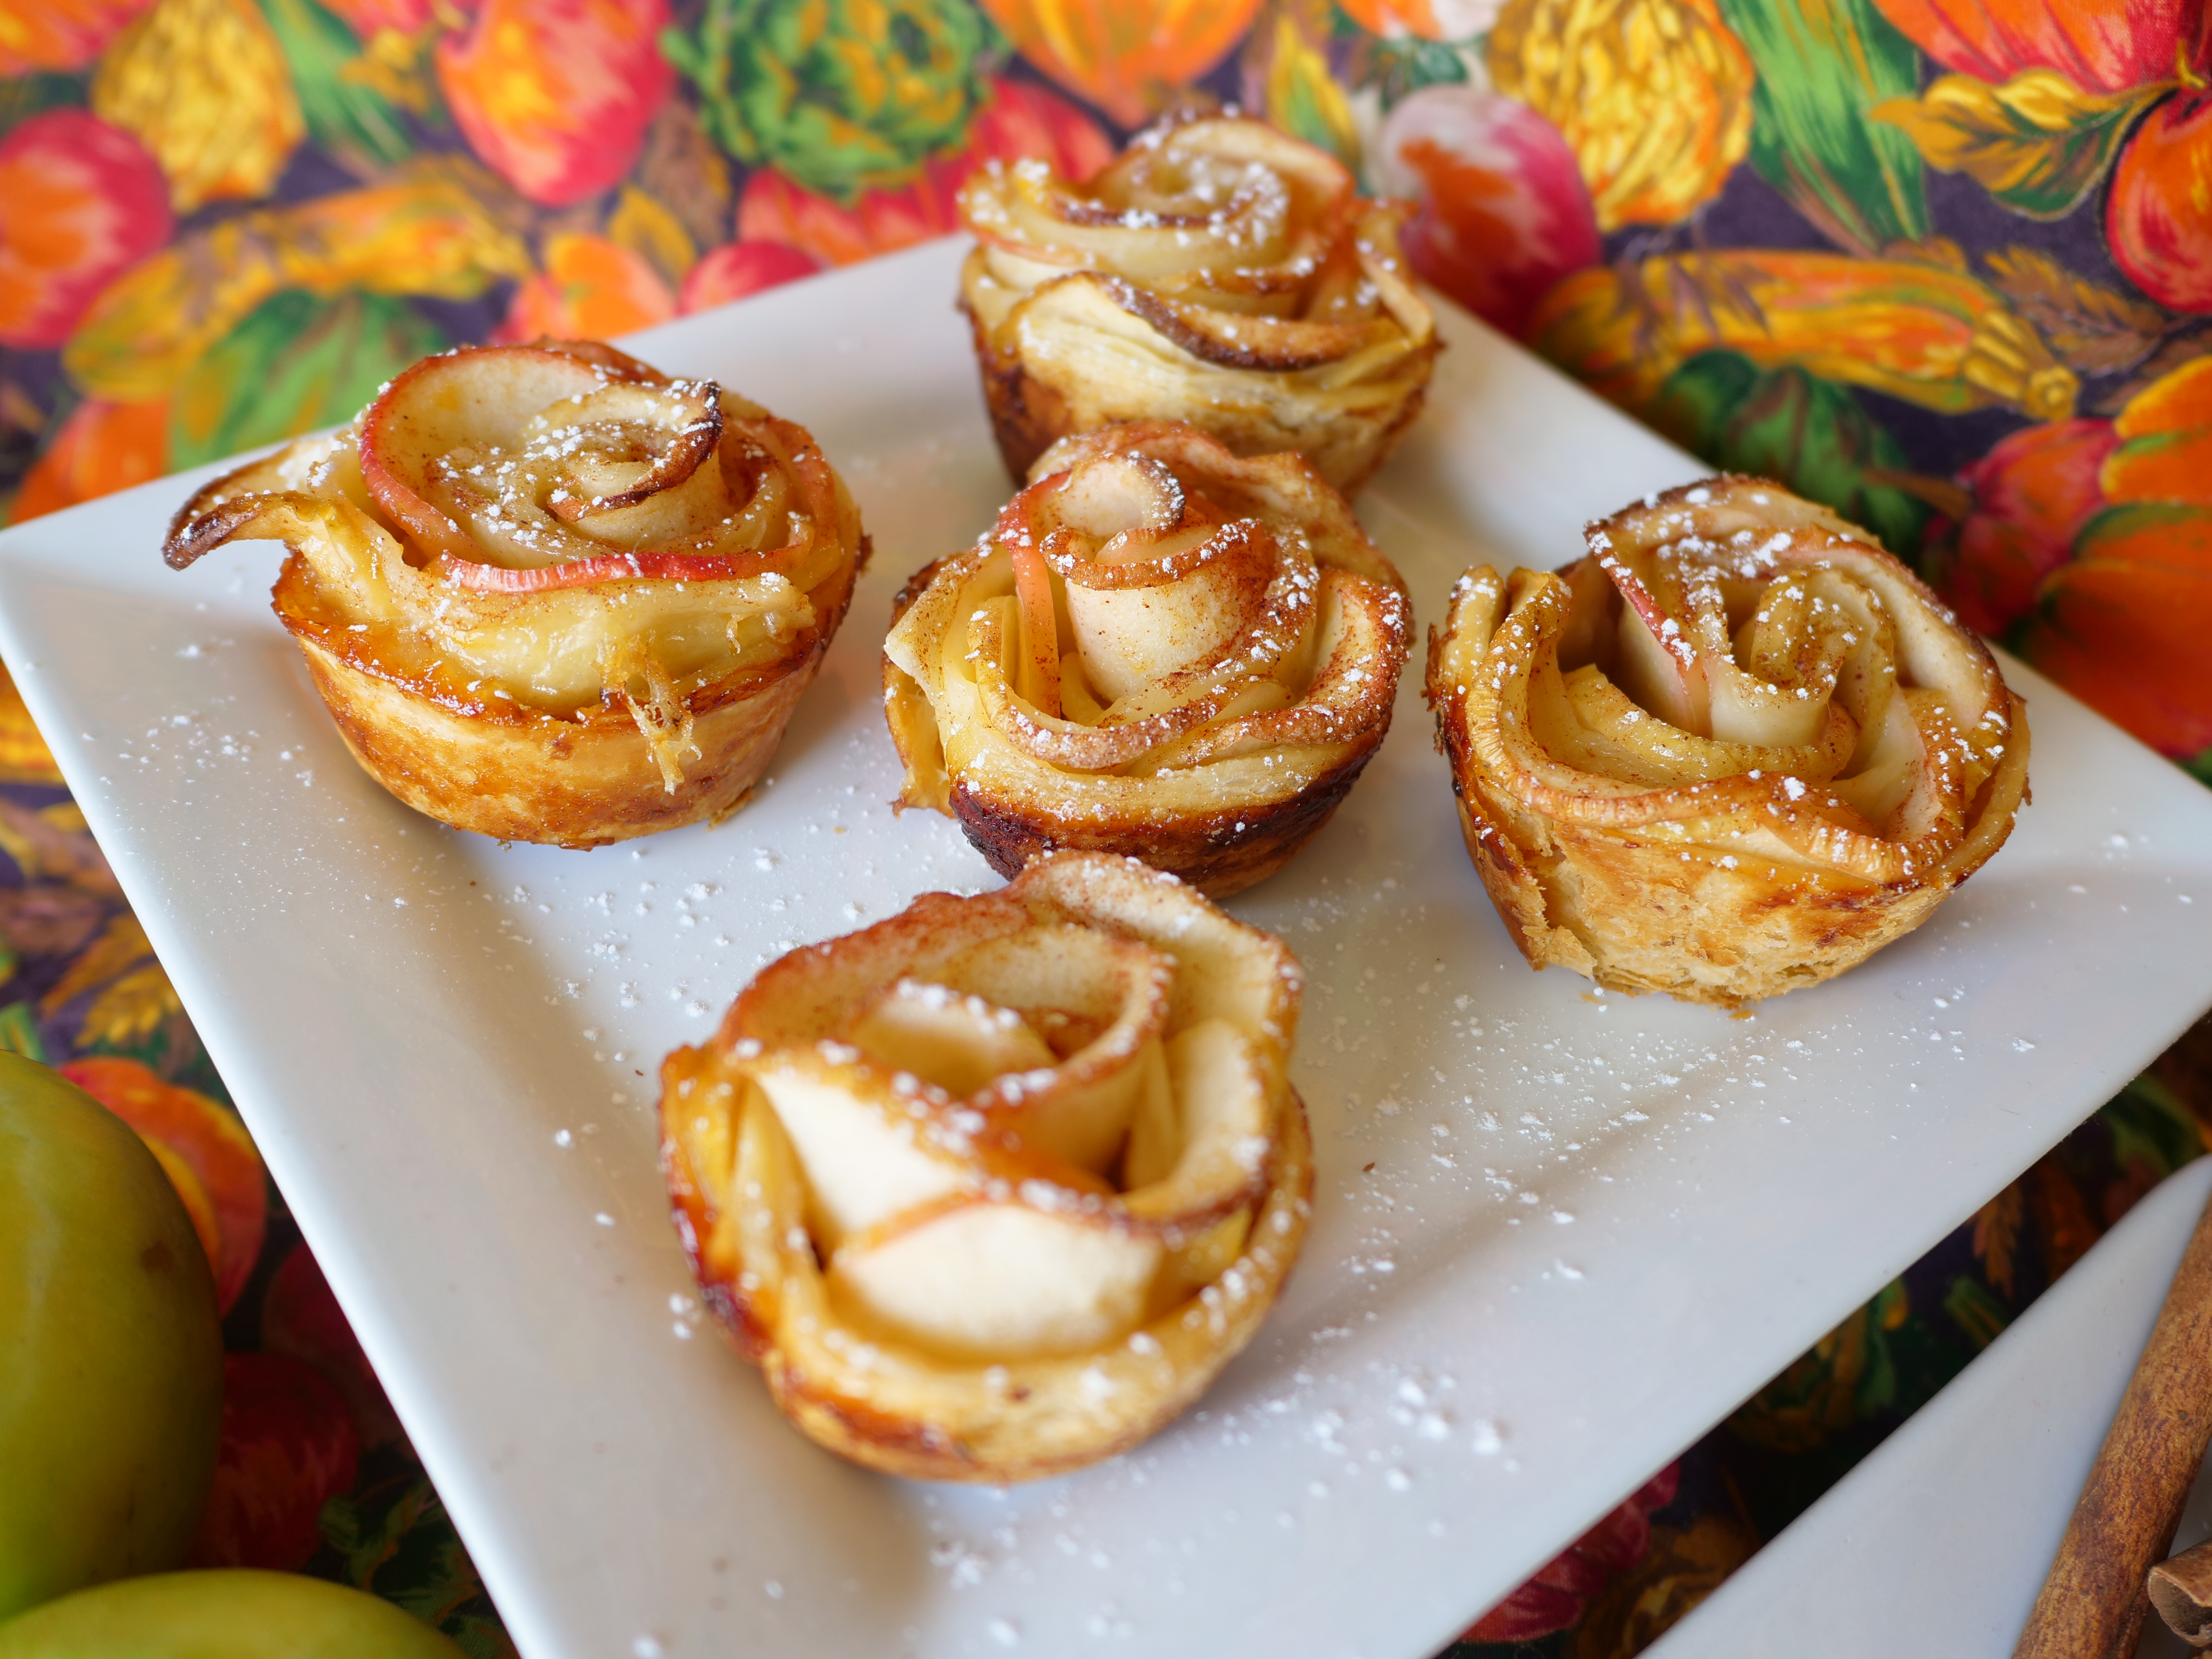
Apple Roses
I’d seen these before, as has anyone who has even been on Pinterest, and I wanted to give them a try. Here’s a video to show how it’s done. It was a bit time consuming, but not a big deal for an avid baker. The final result is very pretty indeed, but I confess, a bit lacking in the taste department.
Another issue is that the puff pastry on the inside of the rose took FOREVER to cook and even after more than doubling the baking time, didn’t cook all the way through like I wanted. So if you give these a try, roll your puff pastry as thin as you can and be prepared to cook longer than the recipe says.
If I had to do it again, I would toss my apple slices in cinnamon sugar before placing on the pastry strip, for added flavor, and keep my strips on the shorter side, so the inside dough could bake more efficiently.